Sass is a productivity tool that helps you organise and maintain your style sheets. It's main benefits include the following:
- Simplified syntax: Sass allows you to write CSS in a more concise and easier to read format, with features like nesting, variables, mixins, and inheritance. This can save you time and make your code more maintainable.
- Reusability: Sass allows you to define reusable code (e.g. mixins) and apply it across your project. This can reduce duplication and make your code more modular.
- Organization: Sass allows you to organize your code better, with features like partials, which break your code into smaller, more manageable files. This can make your code easier to navigate and debug.
- Maintainability: Sass makes it easier to maintain your code over time, with features like inheritance and mixins, which allow you to make changes to your styles in a single location, rather than having to update multiple instances of the same code.
- Compatibility: Sass is compatible with all versions of CSS, so you can use it to take advantage of the latest CSS features while still ensuring compatibility with older browsers.
Overall, using Sass can help you write better CSS faster, with less code and less repetition. It can make your code more maintainable and scalable over time, and help you stay up to date with the latest CSS features.
If you are new to Sass, I advise you to check the guide for a great introduction to using Sass in your application. I'll provide an example of using Bootstrap Sass later. In order to get the benefits of Sass, you need a Sass compiler - a tool that processes your Sass files and produces the CSS files that your web app can use. You can compile Sass from the command line once you have Sass installed, or you can use an extension to manage this process when working in VS or VS Code. Extensions work nicely with the Hot Reload feature in both Visual Studio and VS Code, so I'll look at examples for both environments.
Visual Studio
When working in Visual Studio, I use the Web Compiler 2022+ extension from Jason Moore. It is a fork of an extension developed by Mads Kristensen of Microsoft, updated to work with VS 2022. You can obtain it by going to the Extensions menu item within VS, and clicking Manage Extensions. Then, ensure that the Online option is selected on the left hand side of the dialog that appears, and search for "Web Compiler 2022".
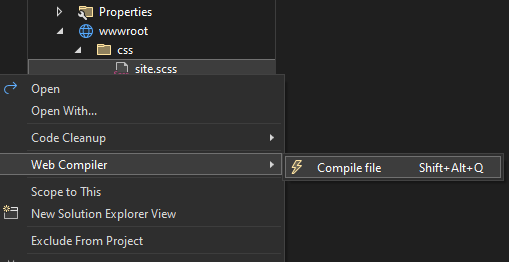
Once installed, it is easy to use. Right click on any .scss file and choose the Web Compiler option from the menu. Then choose Compile file:
The first time you do this, a compilerconfig.json file is created in the root of the application, which, as you can probably guess, serves as the configuration for the Sass compiler. The initial contents of the file contain a single entry for the file that you compiled, the result of which by default is output to the same location with a .css extension.
[
  {
    "outputFile": "wwwroot/css/site.css",
    "inputFile": "wwwroot/css/site.scss"
  }
]
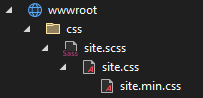
The minifier is enabled by default, so you should also see a .min.css file in the same location:
The default behaviour of the compiler is configured in the
compilerconfig.json.defaults file which was generated along
with the compiler config. If, for example, you want to turn off
minification, you can set enabled to false in the
minifiers:css
setting:
"minifiers": {
  "css": {
    "enabled": false,
    "termSemicolons": true,
    "gzip": false
  },
  "javascript": {
    "enabled": true,
    "termSemicolons": true,
    "gzip": false
  }
}
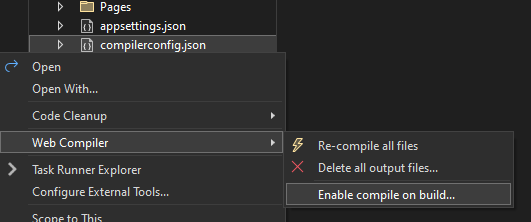
The extension also includes an option to add a build step that enables compilation. Right click on the compilerconfig.json file and choose Web Compiler - Enable compile on build...
This results in a Nuget package being installed that adds the required build step.
Visual Studio Code
Live Sass Compiler is one of the most popular Sass compilers for Visual Studio Code. Search for "live sass compiler" in the Extension marketplace:
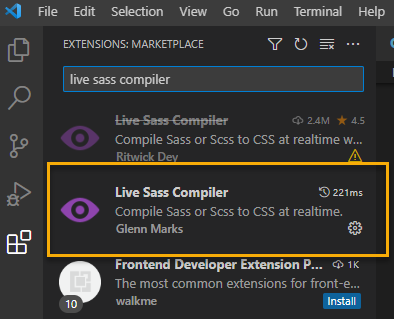
While this version only has c. 800k downloads (at the time of writing), it is the most up to date version of the extension. Once installed, go to File > Preferences > Settings and then search for "live sass compiler" again, or locate Live Sass Compiler under the extensions node in the Commonly Used pane. You should be presented with the settings editor for the extension.
Some settings can be set directly from the screen that appears, but most of them require editing in the settings.json file. So click on Edit in settings.json and add the following
"liveSassCompile.settings.formats": [
    {
        "format" :"expanded",
        "extensionName": ".css",
        "savePath": "~/"
    },
    {
        "format" :"compressed",
        "extensionName": ".min.css",
        "savePath": "~/"
    }
],
This configures two output formats: the first produces standard
css files with white space and indentation. The second produces the
minified version for use in production. Both have a savePath
setting of ~/, which represents the location of the
.scss file being compiled. Further settings and commands are
available at the
Github site for the extension project.
Using Bootstrap Sass
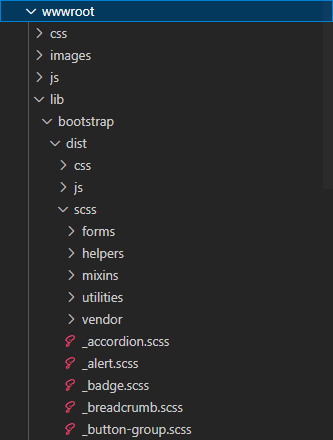
Finally, here's a quick example to illustrate how to get the extensions to compile your scss files to css using Bootstrap Sass to generate colours. First, download the Bootstrap source files (https://github.com/twbs/bootstrap/archive/v5.2.3.zip) and then unzip the scss folder and its contents to wwwroot/lib/bootstrap/dist/ so that the resulting folder structure looks like this:
Next, rename the default site.css file to site.scss. Then change the content as follows:
@import "../lib/bootstrap/dist/scss/_functions.scss";
@import "../lib/bootstrap/dist/scss/_variables.scss";

html {
  font-size: 0.9rem;
  color: $blue-900;
}

@media (min-width: 768px) {
  html {
    font-size: 1rem;
  }
}

html {
  position: relative;
  min-height: 100%;
}

body {
  margin-bottom: 60px;
  background-color: $white;
}
The first two lines import the Bootstrap Sass functions and variables and enables use to use variables for colours. As mentioned earlier, in Visual Studio, you can right click on the site.scss file and choose Web Compiler > Compile file. From then on, the Web Compiler extensions watches for any changes and will recompile as required. In VS Code, you need to activate the compiler which you can so by simply clicking Watch Sass in the Status bar at the bottom of the IDE:

Before you do that, you want to add an exclusion to the settings so that the contents of the Bootstrap scss folder that you just added are not compiled:
"liveSassCompile.settings.excludeList":[
    "/**/lib/bootstrap/dist/scss/**"
],
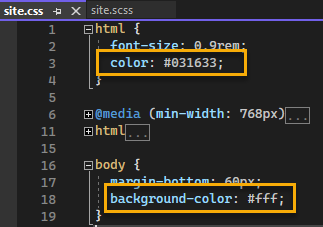
Once you've done all that, you should find a newly created site.css file with the colour variables replaced with hex colours:
Summary
Using Sass can help create better CSS faster, with less repetition and maintenance. In this article, I've shown how to integrate and configure Sass compilation in an ASP.NET Core project using the Web Compiler extension in Visual Studio and the Live Sass Compiler extension in VS Code. Finally, I provided an example usage of Sass that leverages Bootstrap Sass variables to generate hex colours in a CSS style sheet.
