Up until .NET 6, your options for working with JSON in Razor Pages were pretty much restricted to using page handler methods to accept and return JSON, or adding Web API controllers to the application. Returning JsonResults from page handler methods work, but there is something a little hacky about this approach. Razor pages are intended for generating UI, not providing data services over HTTP. Every time you call a page handler method from script, the PageModel and all its dependencies are instantiated whether they are needed or not. You can use Web API controllers, of course, but they require some additional configuration to get them to work.
Working with minimal API request handlers is designed to provide a low
complexity experience. You register request handlers with the Map[HttpMethod]
method on WebApplication - MapPost, MapGet,
MapPut, and so on, using a similar HTTP method based naming
convention to the one that you use to register page handler methods in a
PageModel class. Recall that an instance of the WebApplication
type is returned from the builder.Build method call in Program.cs
(discussed
in my previous article). You pass in a route template and a route
handler - a standard .NET Delegate that executes when the
route matches. This can be a named function or a lambda expression that
can take parameters. The route handler can be configured to return one
of many built-in response types, including JSON, text, and files. The
obvious omission from the built-in return types is HTML. That’s
what Razor Pages is for.
I'm going to explore this new feature by implementing a simple one-page CRUD app that revolves around the same Car model and service that I have used in previous posts.
I have a Car class defined in a folder called Models:
namespace MinimalAPIs.Models;

public class Car
{
    public int Id { get; set; }
    public string Make { get; set; }
    public string Model { get; set; }
    public int Year { get; set; }
    public int Doors { get; set; }
    public string Color { get; set; }
    public decimal Price { get; set; }
}
I've got a simple service that contains some basic CRUD operations against a list of cars:
public class CarService : ICarService
{
    public List<Car> GetAll() => cars;
    public void Save(Car car)
    {
        if (car.Id != 0)
        {
            var carToUpdate = cars.FirstOrDefault(c => c.Id == car.Id);
            if (carToUpdate != null)
            {
                cars.Remove(carToUpdate);
            }
        }
        else
        {
            car.Id = cars.Max(c => c.Id) + 1;
        }
        cars.Add(car);
    }

    public Car Get(int id) => cars.FirstOrDefault(c => c.Id == id);


    private List<Car> cars = new (){
        new Car { Id = 1, Make = "Audi", Model = "R8", Year = 2018, Doors = 2, Color = "Red", Price = 79995 },
        new Car { Id = 2, Make = "Aston Martin", Model = "Rapide", Year = 2014, Doors = 2, Color = "Black", Price = 54995 },
        new Car { Id = 3, Make = "Porsche", Model = " 911 991", Year = 2020, Doors = 2, Color = "White", Price = 155000 },
        new Car { Id = 4, Make = "Mercedes-Benz", Model = "GLE 63S", Year = 2021, Doors = 5, Color = "Blue", Price = 83995 },
        new Car { Id = 5, Make = "BMW", Model = "X6 M", Year = 2020, Doors = 5, Color = "Silver", Price = 62995 },
    };
}
The service implements this interface:
public interface ICarService
{
    List<Car> GetAll();
    Car Get(int id);
    void Save(Car car);
}
And it's registered as a singleton so that any state within the service is maintained:
builder.Services.AddSingleton<ICarService, CarService>();
The following declaration registers a request handler that responds to
GET requests. It takes a route template, optionally some
parameters and returns a result. The request handler is declared in Program.cs,
just before the app.Run method call. If you are using the
older Startup approach to configuration, the registration will go in the
Configure method after the call to UseEndpoints:
app.MapGet("/api/cars",  (ICarService service) =>
{
    return Results.Ok(service.GetAll());
});
The parameter in this example is the ICarService, which
is resolved from the DI container. Parameters are bound from a number of
other sources:
- route values
- query string
- request headers
- body
We can explicitly specify the parameter binding source using one of the
From* attributes: FromRoute, FromBody,
FromHeader, FromQuery or FromServices.
The Results.Ok method returns the value passed in to it
serialised to JSON with a 200 status code. So we have an API that will
repsonde to GET requests at /api/cars, and will return a
collection of cars serialised to JSON. Let's add a page to call this
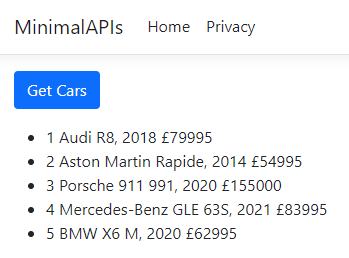
endpoint and display the data. Here's some simple markup for a button
and an unordered list:
<button class="btn btn-primary" id="get-cars">Get Cars</button>

<ul class="results mt-3"></ul>
Next, we need some script that wires up a click event handler to the button, fetches the data from the API and populates the unordered list:
@section scripts{
    <script>
        const list = document.querySelector('ul.results');
        const getAll = document.getElementById('get-cars');

        getAll.addEventListener('click', () => {
            showCars();
        });

        const showCars = () => {
            list.innerHTML = '';
            fetch("/api/cars")
            .then(response => response.json())
            .then(cars => {
                for(let i = 0;i < cars.length;i++){
                    let item = document.createElement('li');
                    item.innerText =  `${cars[i].id} ${cars[i].make} ${cars[i].model}, ${cars[i].year} £${cars[i].price}`;
                    item.classList.add('edit-car');
                    item.dataset.id = cars[i].id;
                    item.dataset.bsToggle = 'modal';
                    item.dataset.bsTarget = '#car-modal';
                    item.addEventListener('click', (event) =>{
                        getCar(event.target.dataset.id);
                    });
                    list.appendChild(item);
                }
            });
        }
    </script>
}
This code uses the Fetch API to make a call to the API, and then
iterates the returned data, assigning each car to a list item. While
doing so, it adds some attributes to the list item that will be used to
invoke a Bootstrap modal for editing the car later. It also adds a click
event handler to each item that will call a method called getCar,
which is yet to be defined. However, if you run the page and click the
button, the list of cars appears:
Next, we add a partial page to the Pages/Shared folder named _CarModal.cshtml. This will contain a form in a Bootstrap modal that we will use to add new cars and edit existing ones. The complete markup for the file is as follows:
@model Car
<div class="modal fade" tabindex="-1" role="dialog" id="car-modal">
    <div class="modal-dialog" role="document">
        <div class="modal-content">
            <div class="modal-header">
                <h5 class="modal-title">Save Car</h5>
                <button type="button" class="btn-close" data-bs-dismiss="modal"></button>
            </div>
            <div class="modal-body">
                <input asp-for="Id" type="hidden">
                <div class="form-group">
                    <label asp-for="Make"></label>
                    <input asp-for="Make" class="form-control">
                </div>
                <div class="form-group">
                    <label asp-for="Model"></label>
                    <input asp-for="Model" class="form-control">
                </div>
                <div class="form-group">
                    <label asp-for="Year"></label>
                    <input asp-for="Year" class="form-control">
                </div>
                <div class="form-group">
                    <label asp-for="Doors"></label>
                    <input asp-for="Doors" class="form-control">
                </div>
                <div class="form-group">
                    <label asp-for="Color"></label>
                    <input asp-for="Color" class="form-control">
                </div>
                <div class="form-group">
                    <label asp-for="Price"></label>
                    <input asp-for="Price" class="form-control">
                </div>
            </div>
            <div class="modal-footer">
                <button type="button" class="btn btn-primary" data-bs-dismiss="modal" id="save-car">Save changes</button>
                <button type="button" class="btn btn-secondary" data-bs-dismiss="modal">Close</button>
            </div>
        </div>
    </div>
</div>
The model for this file is a Car. To avoid having to use
the fully qualified reference to the Car type, we add a using
directive to the _ViewImports file:
@using MinimalAPIs.Models
We use the partial
tag helper to include the partial in the page, passing a new
instance of Car to the model:
<partial name="_CarModal" model="new Car()"/>
Now let's implement the JavaScript getCar method that is
called by the click event handlers on the list items:
const getCar = (id) => {
    fetch(`/api/car/${id}`)
    .then(response => response.json())
    .then(car => {
        document.getElementById('Id').value = car.id;
        document.getElementById('Model').value = car.model;
        document.getElementById('Make').value = car.make;
        document.getElementById('Year').value = car.year;
        document.getElementById('Doors').value = car.doors;
        document.getElementById('Color').value = car.color;
        document.getElementById('Price').value = car.price;
    });
}
This method makes a Fetch request to a new API endpoint
at /api/car/, passing in the Id of the
specific car obtained from the data-id attribute that was
added to the list item when it was generated. The returned Car
has its properties assigned to form controls in the modal. We need to
define that endpoint and get it to return a Car instance,
serialised to JSON. the following is added to Program.cs, just
after the previous API:
app.MapGet("/api/car/{id:int}", (int id, ICarService service) =>
{
    var car = service.Get(id);
    return car;
});
The route template takes a parameter representing a route value, just
like the rest
of Razor Pages. The parameter
can optionally be constrained. This time, the return type of the
API is a simple object rather than an IResult. By default,
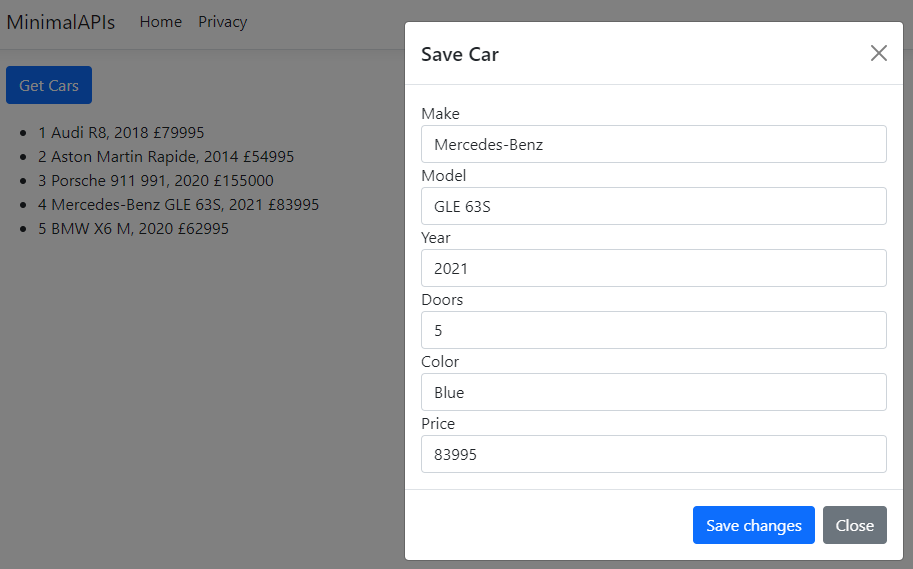
this will be serialised to JSON. Once all of this has been added, we can
run the application, click the Get Cars button, and
then click on a car in the list and see its details appear in the modal:
At the moment, the Save Changes button doesn't do anything other than close the modal. So we will add a reference to it in the script block:
const save = document.getElementById('save-car');
Then we wire up an event listener that calls a saveCar
method:
save.addEventListener('click', () => {
    saveCar();
});
Then we add the saveCar method to the script block:
const saveCar = () => {
    const model = {
        id:  document.getElementById('Id').value,
        model: document.getElementById('Model').value,
        make: document.getElementById('Make').value,
        year: document.getElementById('Year').value,
        doors: document.getElementById('Doors').value,
        color: document.getElementById('Color').value,
        price: document.getElementById('Price').value,
    };
    fetch('/api/save',  {
        method: model.id > 0 ? 'put' : 'post',
        headers: {
            "Content-type": "application/json",
        },
        body: JSON.stringify(model)
    });
}
This method obtains values from the modal form and creates a model. The
model is converted to a JSON string before it is passed to the body of a
Fetch request. the content type is specified as JSON and
the method used for the request depends on whether the model has an Id
value greater than zero. If it does, we are editing a car and use the PUT
method. Otherwise it's a new car so we use the POST
method. This differentiation isn't essential, but it conforms to best
practice for RESTful services, and it helps to illustrate another
feature of the minimal request handler - the ability to support multiple
HTTP methods.
Here is the handler defined for the /api/save route:
app.MapMethods("/api/save", new[] {"POST", "PUT"}, (Car car, ICarService service) =>
{
    service.Save(car);
    return Results.Ok();
});
This time, we use MapMethods to register the request
handler, which enables us to define the HTTP methods that this handler
supports. These are specified in the array that we pass into the second
parameter, so this request handler supports both the POST
and PUT methods.
One final step remains, and that is to add a button that invokes the modal form with empty inputs so that we can add new cars:
<button class="btn btn-success" data-bs-toggle="modal" data-bs-target="#car-modal">New Car</button>
Summary
I've only scratched the surface in this introduction, but minimal API request handlers are great for working with JSON in a .NET 6 Razor Pages application. They are lightweight and fast, and save you having to configure Web API controllers or hacking away at returning JsonResults in from a page handler method.
The complete code for this article is available at https://github.com/mikebrind/MinimalAPIs.
