The ASP.NET Identity system replaces SimpleMembership and the WebSecurity helper. SimpleMembership is tied exclusively to SQL Server and SQL Compact 4.0 (which is being deprecated). ASP.NET Identity allows you to choose your own storage mechanism. There are already providers for popular storage systems like SQL Server, MySQL, RavenDB and others, and information on how to implement your own custom storage provider is available. SimpleMembership is fully dependent on the ASP.NET 2.0 Membership APIs which are locked into System.Web. This is a huge library that contains nearly all things ASP.NET, including caching, security, server controls, charting and so on. The current movement within ASP.NET is towards a more modular framework delivered as Nuget packages which allows the developer to only pick those parts needed for the application. This reduces the footprint of the deployed application - particularly useful in an Azure scenario, and also enables the ASP.NET developers to take a more agile approach to feature releases.
ASP.NET Identity targets version 4.5 of the .NET Framework. Unfortunately, this means that it cannot be used with WebMatrix. So, if you haven't done so already, now is the time to ditch WebMatrix in favour of Visual Studio. The free version - Visual Studio Express for Web is available for download here.
The first step in this walk through involves changing the target framework for your Web Pages site and is only necessary if the site began development in WebMatrix, or if you chose the Razor v2 option when creating the site in Visual Studio. The sample site used in this exercise began life as an Empty Site in WebMatrix.
Changing the target framework
- Open the site in Visual Studio using the Open Website option.
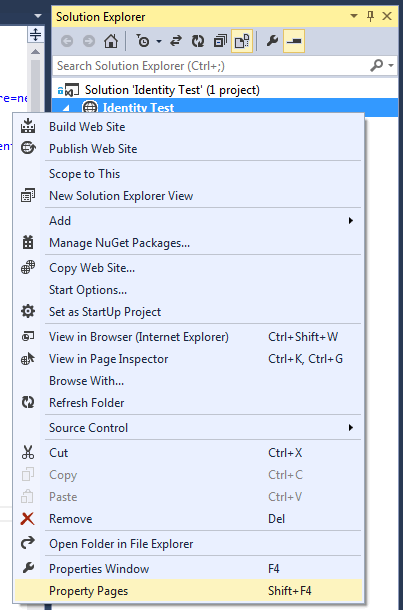
Right click on the web site in Solution Explorer and select the Property Pages option, or press Shift+F4
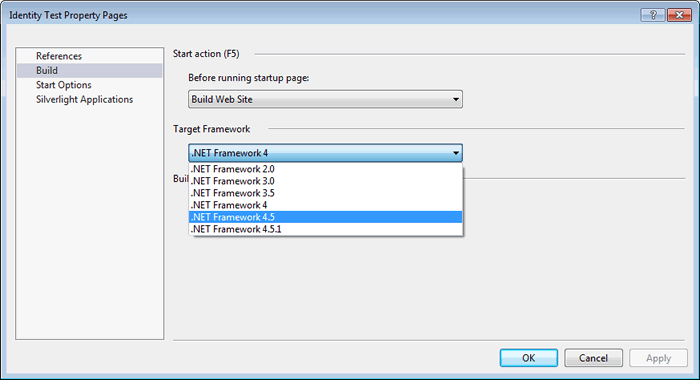
In the Build section, choose .NET Framework 4.5 from the Target Framework drop down
Press F5 to launch the site and save the solution if prompted.
Adding ASP.NET Identity
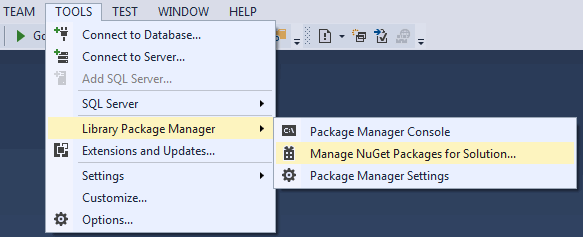
The ASP.NET Identity framework is available from Nuget. From the Tools menu, select Library Package Manager and then Manage Nuget Packages for Solution:
Enter "Identity" into the search bar and then choose to install Microsoft ASP.NET Identity EntityFramework.
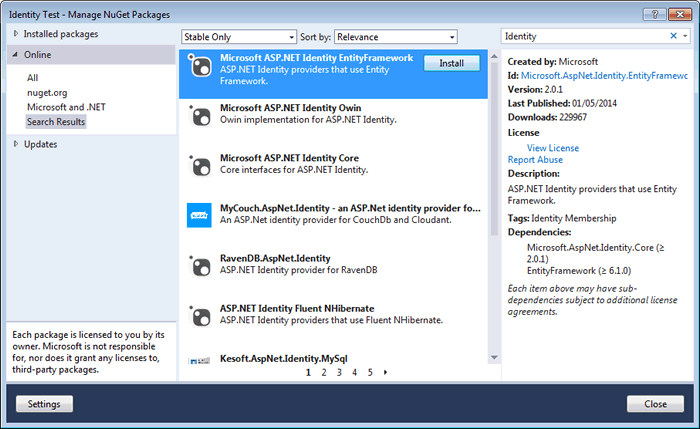
The default implementation of ASP.NET Identity uses Entity Framework Code First for managing storage. This package includes the relevant providers. It will also install Microsoft AspNet Identity Core and the latest version of Entity Framework, which at the time of writing is 6.1.0.
Some changes are required to the web.config file. These are highlighted below.
<?xml version="1.0" encoding="utf-8"?>
<configuration>
  <configSections>
    <!-- For more information on Entity Framework configuration, visit http://go.microsoft.com/fwlink/?LinkID=237468 -->
    <section name="entityFramework" type="System.Data.Entity.Internal.ConfigFile.EntityFrameworkSection, EntityFramework, Version=6.0.0.0, Culture=neutral, PublicKeyToken=b77a5c561934e089" requirePermission="false" />
  </configSections>
  <connectionStrings>
    <add name="DefaultConnection" connectionString="Data Source=(LocalDb)\v11.0;AttachDbFilename=|DataDirectory|\Identity.mdf;Initial Catalog=Identity;Integrated Security=True"
          providerName="System.Data.SqlClient" />
  </connectionStrings>
  <entityFramework>
    <defaultConnectionFactory type="System.Data.Entity.Infrastructure.LocalDbConnectionFactory, EntityFramework">
      <parameters>
        <parameter value="v11.0" />
      </parameters>
    </defaultConnectionFactory>
    <providers>
      <provider invariantName="System.Data.SqlClient" type="System.Data.Entity.SqlServer.SqlProviderServices, EntityFramework.SqlServer" />
    </providers>
  </entityFramework>
  <!--
    For a description of web.config changes see http://go.microsoft.com/fwlink/?LinkId=235367.

    The following attributes can be set on the <httpRuntime> tag.
      <system.Web>
        <httpRuntime targetFramework="4.5" />
      </system.Web>
  -->
  <system.web>
    <compilation debug="true" targetFramework="4.5" />
    <pages controlRenderingCompatibilityVersion="4.0" />
  </system.web>
</configuration>
Adding a Registration Form
Add a new empty Razor Web Page to the site and name it Register.cshtml. Replace the existing mark-up with the following:
@using Microsoft.AspNet.Identity
@using Microsoft.AspNet.Identity.EntityFramework
@{
    var statusMessage = string.Empty;
    if(IsPost){
        var userStore = new UserStore<IdentityUser>();
        var manager = new UserManager<IdentityUser>(userStore);

        var user = new IdentityUser() {
            UserName = Request["UserName"]
        };
        IdentityResult result = manager.Create(user, Request["Password"]);

        if (result.Succeeded) {
            statusMessage = string.Format("User {0} was created successfully!", user.UserName);
        }
        else {
            statusMessage = result.Errors.FirstOrDefault();
        }
    }
}
<!DOCTYPE html>
<html>
    <head>
        <title>Register</title>
        <style>
            body {
                font: 0.9em Calibri;
            }
        </style>
    </head>

    <body>
        <form method="post">
            <fieldset>
                <legend>Register a new user</legend>
                <p>
                    @statusMessage
                </p>
                <div style="margin-bottom:10px">
                    @Html.Label("User Name", "UserName")
                    <div>
                        @Html.TextBox("UserName")
                    </div>
                </div>
                <div style="margin-bottom:10px">
                    @Html.Label("Password", "Password")
                    <div>
                        @Html.Password("Password")
                    </div>
                </div>
                <div>
                    <div>
                        <input type="Submit" value="Register" />
                    </div>
                </div>
            </fieldset>
        </form>
    </body>
</html>
The HTML part of the file uses the HTML form helpers to create a registration form. It is minimalistic and only includes a box for the username and one for the password. The code block contains the more interesting part. Two namespaces are referenced - Microsoft.AspNet.Identity and Microsoft.AspNet.Identity.EntityFramework. Users in ASP.NET Identity are represented through implementations of the IUser interface. Any class that implements this interface must provide an Id property and a UserName property. The Entity Framework class that implements this interface is IdentityUser. As well as the Id and UserName properties, the IdentityUser class includes a number of other properties which are reflected in the schema of the database table that Entity Framework will generate when the application first runs.
An instance of a UserManager is created in the code. Manager classes in ASP.NET Identity are responsible for the business end of operations. The UserManager<T> class is the Entity Framework's means of encapsulating methods for managing users. The core methods are asynchronous, but they are also implemented as synchronous extension methods. This example shows the synchronous methods being used. The extension methods include operations such as Create, Delete, ChangePassword, FindByEmail and so on.
Store classes in ASP.NET represent the underlying storage mechanism (database, XML, Azure Table Storage, etc.) and the means for communicating with it. The UserStore<T> class is an Entity Framework specific class that provides data access methods for communicating with the underlying SQL Server database.
The UserManager.Create method is called. The return type of this method is an instance of the IdentityResult class. This class represents the result of any Identity operation. It has a Succeeded property which is a bool, and indicates whether the attempted operation was successful or not. It also has an Errors property. This is a collection of strings, each one representing an error that occurred during the attempted operation. The code above does not include any validation at all. However, the Entity Framework implementation includes some default business logic that prevents duplicate user names and ensures that passwords are at least 6 characters long. You can alter this via the UserManager.PasswordValidator property:
manager.PasswordValidator = new PasswordValidator {
    RequireDigit = true,
    RequiredLength = 10,
    RequireLowercase = true,
    RequireNonLetterOrDigit = true,
    RequireUppercase = true
};
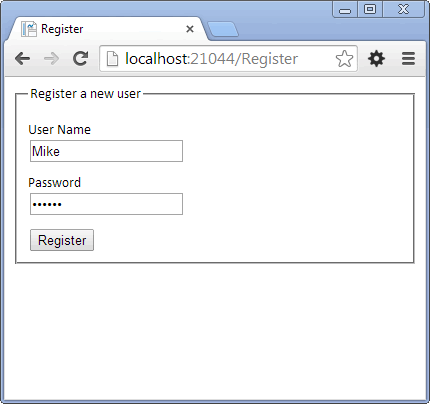
Run the application and enter a user name and a password that is less than 6 characters long:
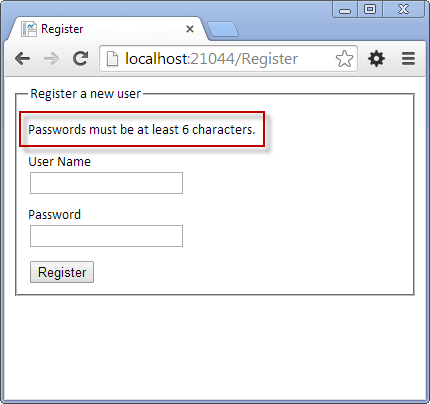
If you click the Register button, you can see the default validation at work:
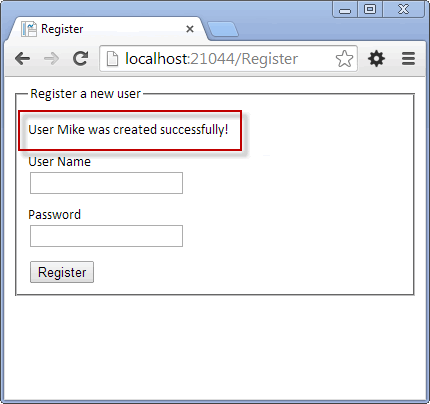
If you enter a valid combination of values, the creation of your account is confirmed:
Exploring the database
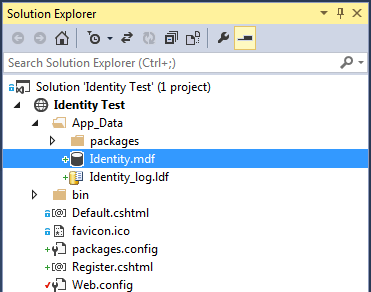
When you successfully created the account for the first time, chances are that the web site took a little while to process the request and provide confirmation. The reason for the delay is that Entity Framework was busy generating a database for storage of your site's users. The generated database is called Identity.mdf and will be found in the App_Data folder of the site:
These details were specified in the connection string you added to the web.config file earlier:
connectionString="Data Source=(LocalDb)\v11.0;AttachDbFilename=|DataDirectory|\Identity.mdf;Initial Catalog=Identity;Integrated Security=True
Right-click on the mdf file and select Open from the menu. You will be taken to the Server Explorer. Expand the Tables node, right-click on AspNetUsers and select Show Table Data:
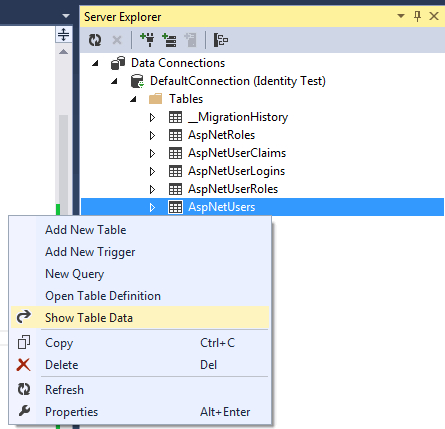
You should be able to see one row of data representing the user you just created.
Authenticating Users
Authentication in SimpleMembership (and its predecessors) is managed in System.Web.Security.FormsAuthentication. From it's name, you can tell that this is part of the System.Web namespace which ASP.NET Identity moves away from. Authentication in ASP.NET Identity is managed in separate Nuget-hosted components. Specifically, the identity framework uses OWIN-based components (or 'middleware'). OWIN is a specification that governs how middleware and web servers should interact, facilitating a plug 'n' play system. You can read more about OWIN here.
-
You can install the OWIN Identity package by going to Tools, Library Package Manager and then Manage Nuget Packages for Solution as before. The search is the same too: "identity".
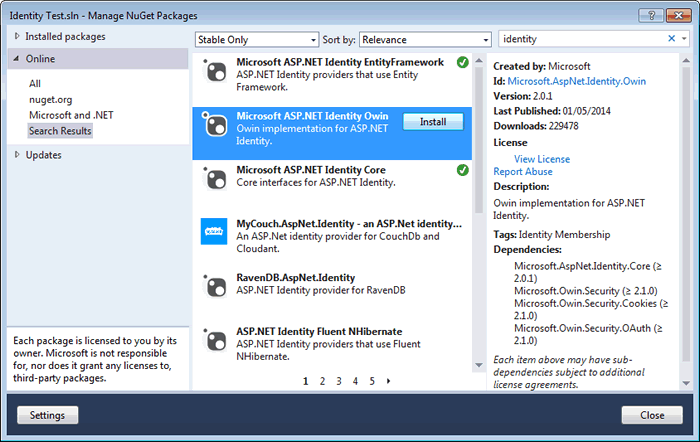
This time, the package that you should install is called Microsoft ASP.NET Identity Owin.
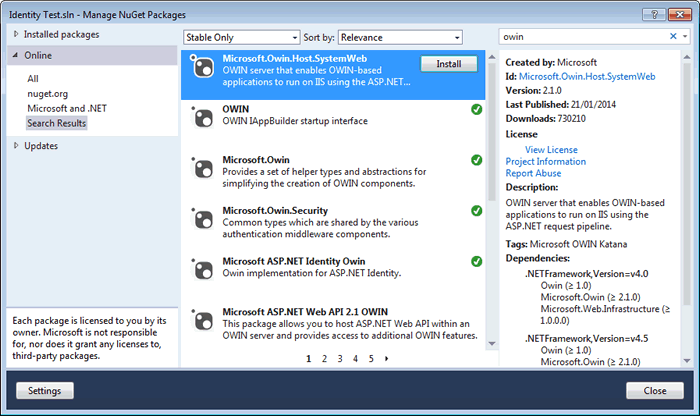
Having installed that package, follow the same process to locate Microsoft.Owin.Host.SystemWeb and install that too.
-
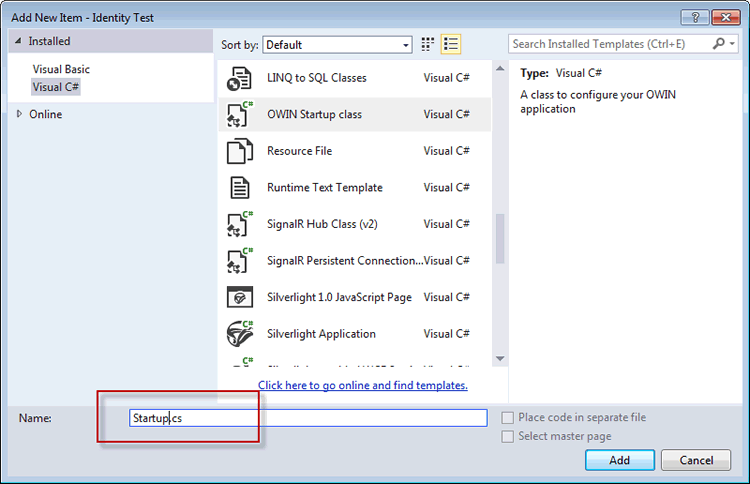
Next, right click on the web site in Solution Explorer and select Add » Add New Item. Locate OWIN Startup Class in the list (you can type 'owin' in the search bar to filter the list), name it Startup.cs and click the Add button.
-
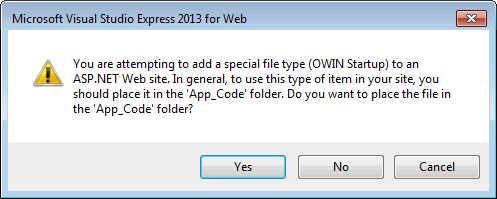
When you click the Add button, you will be prompted to save the file in an App_Code folder:
-
Add the following highlighted lines of code to the file:
using System;
using System.Threading.Tasks;
using Microsoft.AspNet.Identity;
using Microsoft.Owin;
using Microsoft.Owin.Security.Cookies;
using Owin;

[assembly: OwinStartup(typeof(Startup))]

public class Startup
{
    public void Configuration(IAppBuilder app)
    {
        // For more information on how to configure your application, visit http://go.microsoft.com/fwlink/?LinkID=316888
        app.UseCookieAuthentication(new CookieAuthenticationOptions {
            AuthenticationType = DefaultAuthenticationTypes.ApplicationCookie,
            LoginPath = new PathString("/Login")
        });
    }
}
You need a way to tell an OWIN application which components its should use. There are three ways to do this, two of which are demonstrated in the above code. The first is to provide a public class named "Startup". The second is to specify the class type used for configuration using the assembly attribute. In this example, the type passed in is the same, but if it was different, the attribute would override the class naming convention. The third method is to specify the class name in the AppSettings section of the web.config file. See OWIN Startup Class Detection for more information.
In this particular example, the code above specifies that OWIN cookie authentication should be used with the configured options, which includes a URL for the login page.
-
Alter the code block in the Register.cshtml file to include the highlighted parts below:
@using Microsoft.AspNet.Identity
@using Microsoft.AspNet.Identity.EntityFramework
@using Microsoft.Owin.Security
@{
    var statusMessage = string.Empty;
    if(IsPost){
        var userStore = new UserStore<IdentityUser>();
        var manager = new UserManager<IdentityUser>(userStore);

        var user = new IdentityUser() {
            UserName = Request["UserName"]
        };
        var result = manager.Create(user, Request["Password"]);

        if (result.Succeeded) {
            var authenticationManager = HttpContext.Current.GetOwinContext().Authentication;
            var userIdentity = manager.CreateIdentity(user, DefaultAuthenticationTypes.ApplicationCookie);
            authenticationManager.SignIn(new AuthenticationProperties() { }, userIdentity);
            Response.Redirect("~/Login");
        }
        else {
            statusMessage = result.Errors.FirstOrDefault();
        }
    }
}
The alteration creates a ClaimsIdentity object, which represents a claims-based identity. The ASP.NET Identity framework is a claims-based identity system. A claim is a statement related to an identity such as their name or their role. Sometimes these claims can be provided by a third party e.g. when you allow someone to log in via Facebook. In those cases, the third party becomes the Claims provider, and it's up to you whether you trust the provider and accept the claims. The ClaimsIdentity object encapsulates all of this information. The user is authenticated via the AuthenticationManager's SignIn method and redirected to the Login page, which will be created next.
-
Create a new Razor Web Page called Login.cshtml and replace the existing code with the following:
@using Microsoft.AspNet.Identity
@using Microsoft.AspNet.Identity.EntityFramework
@using Microsoft.Owin.Security
@{
    var statusMessage = string.Empty;
    if (User.Identity.IsAuthenticated) {
        statusMessage = string.Format("Hello {0}!!", User.Identity.GetUserName());
    }
    if (Request["Action"] == "Log In") {
        var userStore = new UserStore<IdentityUser>();
        var userManager = new UserManager<IdentityUser>(userStore);
        var userName = Request["UserName"];
        var password = Request["Password"];
        var user = userManager.Find(userName, password);

        if (user != null) {
            var authenticationManager = HttpContext.Current.GetOwinContext().Authentication;
            var userIdentity = userManager.CreateIdentity(user, DefaultAuthenticationTypes.ApplicationCookie);

            authenticationManager.SignIn(new AuthenticationProperties() { IsPersistent = false }, userIdentity);
            Response.Redirect("~/Login");
        }
        else {
            statusMessage = "Invalid username or password.";
        }
    }
    if (Request["Action"] == "Log Out") {
        var authenticationManager = HttpContext.Current.GetOwinContext().Authentication;
        authenticationManager.SignOut();
        Response.Redirect("~/Login");
    }
}
<!DOCTYPE html>
<html>
<head>
    <title>Log In</title>
    <style>
        body {
            font: 0.9em Calibri;
        }
    </style>
</head>
<body>
    @if(User.Identity.IsAuthenticated){
    <form method="post">
        <fieldset>
            <legend>Log In</legend>
            <p>
                @statusMessage
            </p>
            <div>
                <div>
                    <input type="Submit" name="Action" value="Log Out" />
                </div>
            </div>
        </fieldset>
    </form>
    }
    else
    {
    <form method="post">
        <fieldset>
            <legend>Log In</legend>
            <p>
                @statusMessage
            </p>
            <div style="margin-bottom:10px">
                @Html.Label("User Name", "UserName")
                <div>
                    @Html.TextBox("UserName")
                </div>
            </div>
            <div style="margin-bottom:10px">
                @Html.Label("Password", "Password")
                <div>
                    @Html.Password("Password")
                </div>
            </div>
            <div>
                <div>
                    <input type="Submit" name="Action" value="Log In" />
                </div>
            </div>
        </fieldset>
    </form>
    }
</body>
</html>
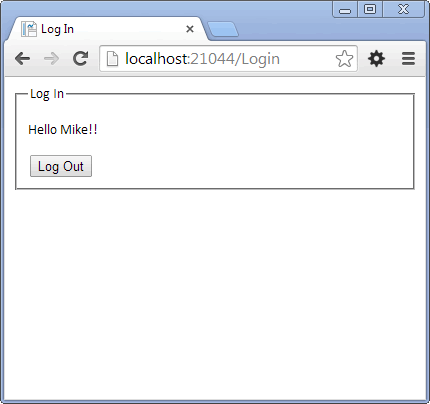
The mark-up in this page provides for two alternate forms. One will appear if the user is authenticated such as if they are redirected for the Register page having successfully registered an account. The view features a welcome messages and a log out button.
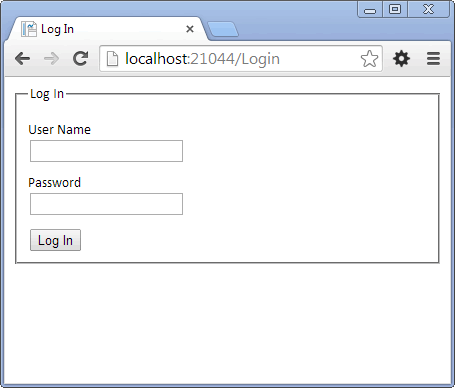
If the user is not authenticated, they will be presented with textboxes for their user name and password.
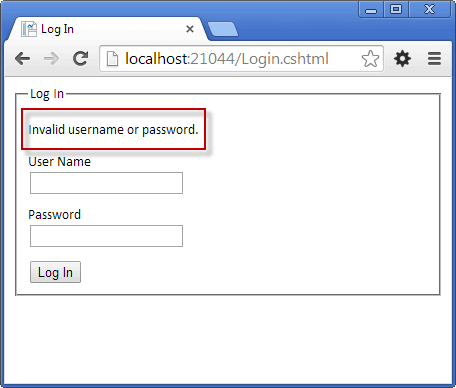
If the user logs in, their username and password are passed to the UserManager.Find method for retrieval. This method returns an IdentityUser object if a successful match is made, or null if not. In the event that no match is found, an error message is displayed:
If the user clicks the Log Out button, the AuthenticationManager.SignOut method is called, which results in the authentication cookie being removed and the user no longer being authenticated.
Summary
This article looked at how you can add the new ASP.NET Identity framework to your Razor Web Pages site. The new framework is claims based and targets .NET 4.5, so you cannot use WebMatrix to work with it. Nevertheless, the article showed how you can acquire and use the free Visual Studio Express for Web 2013 to accomplish the task. Basic registration and authentication were covered along with an introduction to the role that OWIN-based components play in ASP.NET applications.
