Migrations are not new. They have been part of the Entity Framework story since March 2012. They are actually based on Active Record migrations (the primary data access technology used by the Rails framework) which have been around for a lot longer. Code first migrations are not just an ASP.NET thing, either. They can be used in any project featuring the Entity Framework. But therein lies a problem if you are an ASP.NET Web Pages developer. Web Pages sites are built using the website project type, which is not seen as a project by Visual Studio. Web application projects - ones created using the New Project option in Visual Studio - have .csproj or .vbproj files, which detail the files to be included in the project as well as any cross-project references. There are also some other differences for those interested.
If you want to use migrations with an ASP.NET Web Pages site there is a workaround: you can put your data access code in a separate Class Library project. WebMatrix doesn't support the creation of class library projects, but the free Visual Studio Express for Web does. This article will look at how easy it is to build your data layer as a separate component using Code First Migrations in Visual Studio Express 2013 Preview for Web. The steps will be the same if you are using the 2012 version.
I have looked at using the Entity Framework in ASP.NET Web Pages before, and just as before, this sample application will feature books and authors. This article assumes that you have an understanding of how to code an Entity Framework compliant model. If you are unsure about that, please read the previous article first.
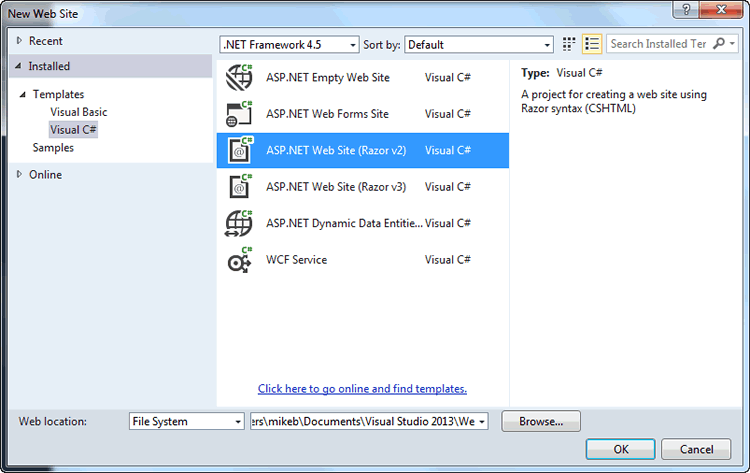
Once you have downloaded Visual Studio Express (if you don't already have it), the first step is to create a Razor Web Site from the New Website option and name it BooksWithMigrations.
This will result in a web site based on the starter site template. For the purposes of this exercise, you will not make use of the StarterSite database, so change the connection string in the web.config file so that the name is BookContext and the database is Books.sdf:
<connectionStrings>
  <add name="BookContext" connectionString="Data Source=|DataDirectory|\Books.sdf" providerName="System.Data.SqlServerCe.4.0" />
</connectionStrings>
In addition, comment out the first line in the _AppStart.cshtml file. You won't be using WebSecurity in this project.
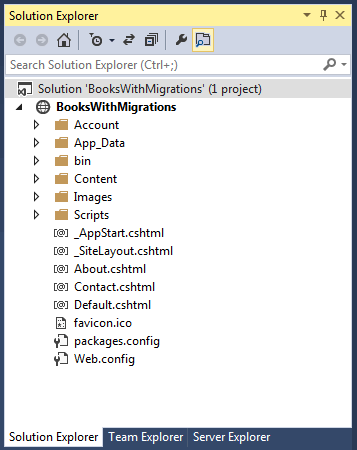
If you look in Solution Explorer, you can see that you have one project in your solution currently.
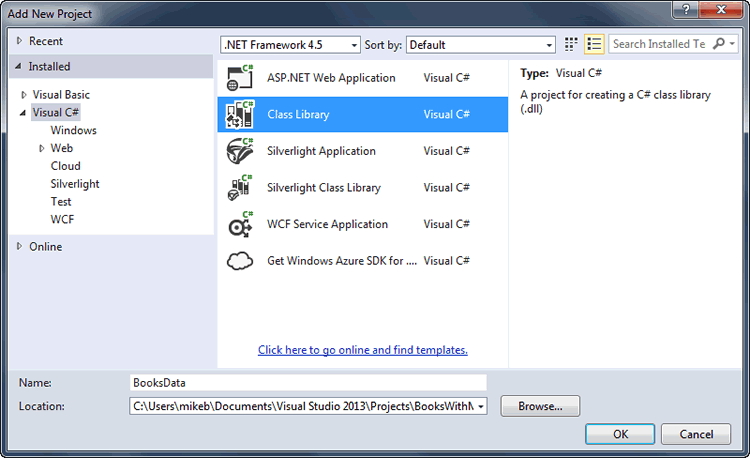
You are about to add another project. Go to File » Add and choose New Project. Choose C# Class Library as the project type, and name it BooksData.
Next, open up the Package Manager Console. If it doesn't appear as a tab at the bottom of the main window, go to Tools » Library Package Manager » Package Manager Console. At the PM > prompt, type
install-package EntityFramework -projectname BooksData
This will install the most recent version of Entity Framework into the BooksData project based on the version of .NET that you chose. The console message will tell you which version has been installed. At the moment, the latest version is 5, but with version 6 at rc1, this is likely to be replaced imminently.
Now you can write some code. Delete the Class1.cs file that was generated automatically in the class library project. Then create a folder called Entities. Add a class file called Book.cs to the Entities folder, and replace the existing code with the following:
using System;
using System.ComponentModel.DataAnnotations;

namespace BooksData.Entities
{
    public class Book
    {
        public int BookId { get; set; }
        [MaxLength(200)]
        public string Title { get; set; }
        public string Description { get; set; }
        [MaxLength(20)]
        public string ISBN { get; set; }
        public DateTime DatePublished { get; set; }
        public int CategoryId { get; set; }
        public int AuthorId { get; set; }

        public virtual Category Category { get; set; }
        public virtual Author Author { get; set; }
    }
}
Notice that Visual Studio automatically generated a namespace which takes the form Projectname.Foldername. Namespaces are simply a way of grouping related code together. They also define scope, so that for example, you can use the same name for two different classes in a project (if you really needed to), so long as they are in different namespaces. The fully qualified name of a class in a namespace takes the form Projectname.Foldername.Classname. You will see what impact namespaces have on your code soon. In the meantime, you also need classes for Author and Category:
using System.Collections.Generic;
using System.ComponentModel.DataAnnotations;

namespace BooksData.Entities
{
    public class Author
    {
        public int AuthorId { get; set; }
        [MaxLength(35)]
        public string FirstName { get; set; }
        [MaxLength(35)]
        public string LastName { get; set; }
        public string Biography { get; set; }
        public virtual ICollection<Book> Books { get; set; }
    }
}
using System.Collections.Generic;
using System.ComponentModel.DataAnnotations;

namespace BooksData.Entities
{
    public class Category
    {
        public int CategoryId { get; set; }
        [MaxLength(50)]
        public string CategoryName { get; set; }
        public virtual ICollection<Book> Books { get; set; }
    }
}
The final entity needed is the Context. This class inherits from DbContext and acts as the engine behind Entity Framework:
using System.Data.Entity;

namespace BooksData.Entities
{
    public class BookContext : DbContext
    {
        public DbSet<Book> Books { get; set; }
        public DbSet<Author> Authors { get; set; }
        public DbSet<Category> Categories { get; set; }
    }
}
Now that the context exists, you can enable migrations. You do this simply by typing
enable-migrations -projectname BooksData
at the PM > prompt in the Package Manager Console. Once you have done so, you should get confirmation that Code First Migrations are enabled for project BooksData.

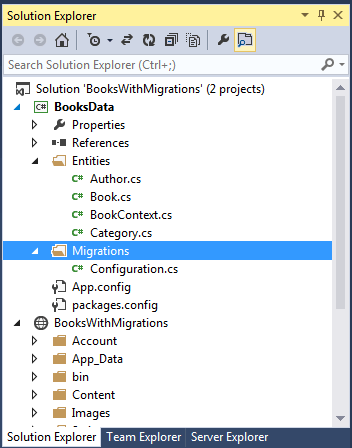
A new folder called Migrations is generated and in that folder there is one file: Configuration.cs.
The Configuration class consists of a constructor that sets AutomaticMigrationsEnabled to false and a Seed method. The Seed method is executed every time you run a migration and is the perfect place to populate your database with some seed data:
namespace BooksData.Migrations
{
    using BooksData.Entities;
    using System;
    using System.Collections.Generic;
    using System.Data.Entity.Migrations;

    internal sealed class Configuration : DbMigrationsConfiguration<BookContext>
    {
        public Configuration() {
            AutomaticMigrationsEnabled = false;
        }

        protected override void Seed(BookContext context) {
            var categories = new List<Category>{
                new Category{CategoryName = "ASP.NET"},
                new Category{CategoryName = "JavaScript"},
                new Category{CategoryName = "HTML5"}
            };

            categories.ForEach(category => context.Categories.AddOrUpdate(c => c.CategoryName, category));
            context.SaveChanges();

            var authors = new List<Author>{
                new Author{FirstName = "Mike", LastName = "Brind"},
                new Author{FirstName = "Imar", LastName = "Spaanjaars"}
            };

            authors.ForEach(author => context.Authors.AddOrUpdate(a => a.LastName, author));
            context.SaveChanges();

            var book = new Book {
                Title = "Beginning ASP.NET Web Pages With WebMatrix",
                Description = "Buy this book!",
                ISBN = "978-1118050484",
                DatePublished = new DateTime(2011, 10, 18),
                AuthorId = 1,
                CategoryId = 1
            };

            context.Books.AddOrUpdate(b => b.ISBN, book);
            context.SaveChanges();
        }
    }
}
I have tidied mine up a bit - I have included a using directive at the top for the BooksData.Entities namespace. This allows me to reference entities names without having to use their fully qualified name. Notice that the code uses the AddOrUpdate method. This ensures that rows of data are not duplicated when the Seed method is executed by subsequent migrations. It ensures that the value passed in to the first parameter is unique in the table. For example, If a row with a LastName value of "Brind" is found, no additional data is inserted into the authors table. The AddOrUpdate method is only intended for use in the Seed method.
You are almost ready to run the first migration which will create the database and populate it with the seed data. However, you need to define the location for the database. You do this in the project's app.config file that was generated when you installed the Entity Framework package. You need to specify a connection string which you can do by adding the following just after the entityFramework section:
  <connectionStrings>
    <add name="BookContext"
         connectionString="Data Source=Path_To_Database\Books.sdf"
         providerName="System.Data.SqlServerCe.4.0" />
  </connectionStrings>
The name of your connection string must match that of your context - in this case, BookContext. In the above "Path_To_Database" needs to be replaced with the full file system path to the location where you want the database to be created which should be the App_Data folder of the website project.
Now you are almost ready. Go to the Package Manager Console and type at the prompt:
add-migration InitialCreate -projectname BooksData
Then hit Enter. Assuming all went well, a file is added to the Migrations folder. It's name is a combination of a date stamp and the name you just gave your migration. It inherits from DbMigration and contains two methods: Up and Down. The Up method consists of code for generating the tables and columns based on the entities you coded earlier. The Down method reverses the changes created by Up. Each migration includes both methods so that you can reverse changes if required. Now it's time to run the first migration to create the database. Type the following in the Package Manager Console:
update-database -projectname BooksData
If you check the App_Data folder of your site, you will see that Books.sdf has been created. Unfortunately. VS 2013 Express preview edition doesn't include the ability to view the contents of a SQL CE file, so you will have to revert to WebMatrix. If you chose the Razor 3 option when creating the site instead of Razor 2, WebMatrix won't open the site (at the moment - this should change when Razor 3 is officially launched), so if you want to inspect the content of the database, you have to copy it to a newly create Empty Site.
If you do open the database, you can see the tables have been created for your entities and the seed data has been inserted. In addition, a table called _MigrationHistory has been generated to keep track of migrations.

The point of migrations is not to create the initial database - it is to have changes to the model migrated via code to the database. So the next step will examine how to manage that. Update the Book entity in the BooksData project to include a property called Price set to a decimal data type:
using System;
using System.ComponentModel.DataAnnotations;

namespace BooksData.Entities
{
    public class Book
    {
        public int BookId { get; set; }
        [MaxLength(200)]
        public string Title { get; set; }
        public string Description { get; set; }
        [MaxLength(20)]
        public string ISBN { get; set; }
        public DateTime DatePublished { get; set; }
        public decimal Price { get; set; }
        public int CategoryId { get; set; }
        public int AuthorId { get; set; }

        public virtual Category Category { get; set; }
        public virtual Author Author { get; set; }
    }
}
Then type the following at the Package Manager Console prompt:
add-migration AddPrice -projectname BooksData
Once you hit Enter, the migration code is generated in a new file. The Up method contains a single instruction to add a column called Price to the Books table with a data type of decimal, and the Down method contains code to reverse that change. To propagate the change to the database, type
update-database -projectname BooksData
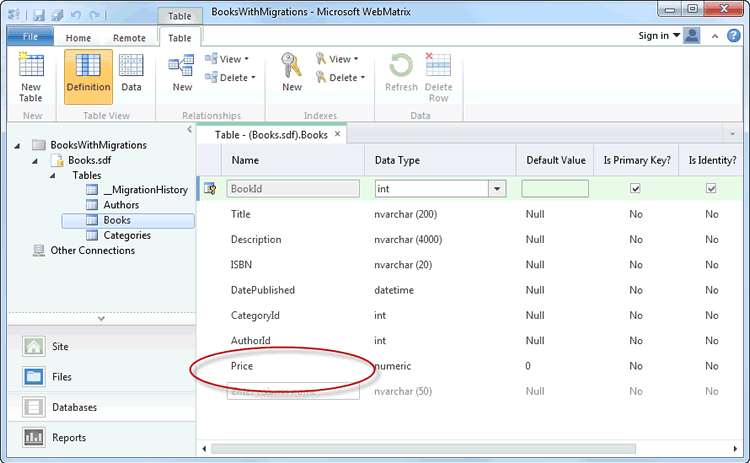
at the prompt and hit Enter. Once the migration has run, you can see the new column in the Books table in the database.
The only thing missing now is a means of getting the data out of the database. Add a new folder to the BooksData class library called Repositories and add a class to that folder called CategoryRepository. The complete code for the class file is as follows:
using BooksData.Entities;
using System;
using System.Collections.Generic;
using System.Linq;

namespace BooksData.Repositories
{
    public class CategoryRepository : IDisposable
    {
        private BookContext _context = new BookContext();
        private bool _disposed;

        public IEnumerable<Category> GetCategories() {
            return _context.Categories.ToList();
        }

        protected virtual void Dispose(bool disposing) {
            if (!_disposed) {
                if (disposing && _context != null) {
                    _context.Dispose();
                }
            }
            _disposed = true;
        }

        public void Dispose() {
            Dispose(true);
            GC.SuppressFinalize(this);
        }
    }
}
The CategoryRepository implements IDisposable and only has two public methods; one returns a collection of Category objects and the other ensures that the BookContext is disposed of properly to prevent memory leaks due to too many open database connections etc. More of that a bit later. Here's a BookRepository that features a wider range of commonly used data access methods:
using BooksData.Entities;
using System;
using System.Collections.Generic;
using System.Data;
using System.Linq;

namespace BooksData.Repositories
{
    public class BookRepository : IDisposable
    {
        private BookContext _context = new BookContext();
        private bool _disposed;

        public int Save(Book book) {
            if (book.BookId.Equals(0)) {
                _context.Books.Add(book);
            }
            else {
                _context.Entry(book).State = EntityState.Modified;
            }
            return _context.SaveChanges();
        }

        public int Delete(int id) {
            var book = new Book { BookId = id };
            _context.Entry(book).State = EntityState.Deleted;
            return _context.SaveChanges();
        }

        public Book Find(int id) {
            return _context.Books.First(b => b.BookId.Equals(id));
        }

        public IEnumerable<Book> GetBooks() {
            return _context.Books.AsNoTracking().ToList();
        }

        public IEnumerable<Book> GetBooksByCategory(int categoryId) {
            return _context.Books.Include("Author").Include("Category").Where(b => b.CategoryId.Equals(categoryId)).ToList();
        }

        protected virtual void Dispose(bool disposing) {
            if (!_disposed) {
                if (disposing && _context != null) {
                    _context.Dispose();
                }
            }
            _disposed = true;
        }

        public void Dispose() {
            Dispose(true);
            GC.SuppressFinalize(this);
        }
    }
}
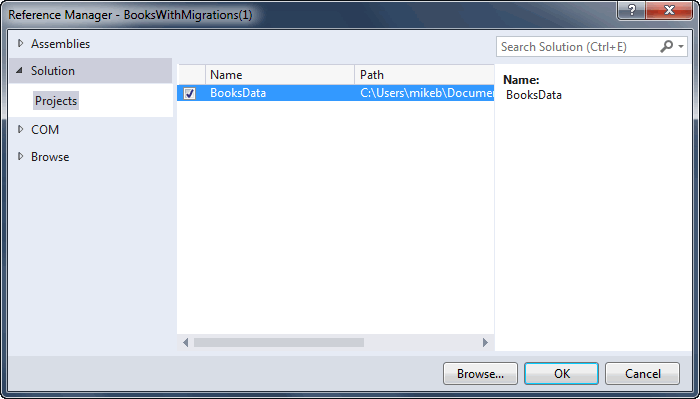
Next, add a reference to the BooksData project from the web site. Click the web site name in Solution Explorer to select it and either right click and choose Add Reference, or go to the WEBSITE menu and choose Add Reference there. In the dialog, choose Solution, and then select the BooksData project.
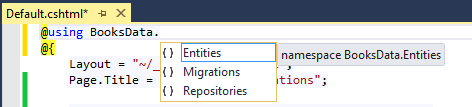
This will result in the BooksData component (dll file) being added to the bin folder of the website when the solution is finally built. But the elements of your BooksData component are available to the web site for coding purposes straight away. To save having to type the fully qualified name of your entities or repositories, add a couple of using directives to the top of Default.cshtml. Intellisense can see the component:
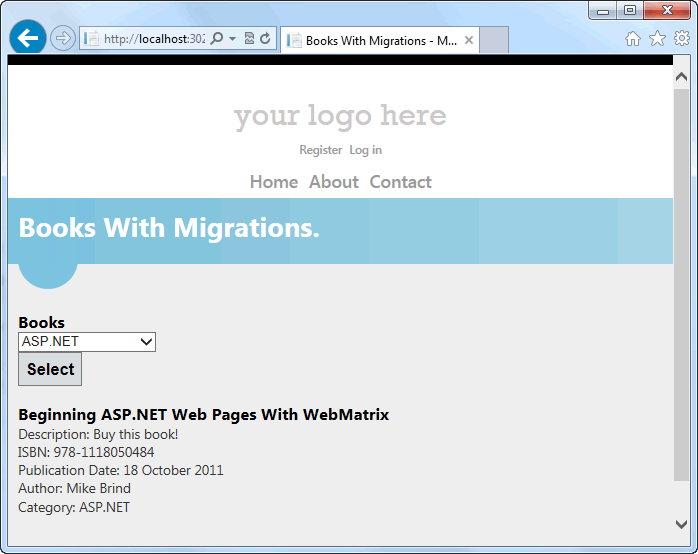
Here's a sample page that populates a dropdown list with categories, and then returns all books that belong to the selected category. If you are working with the seed data, only the ASP.NET category will return any books:
@using BooksData.Entities;
@using BooksData.Repositories;
@{
    Layout = "~/_SiteLayout.cshtml";
    Page.Title = "Books With Migrations";

    var categories = Enumerable.Empty<SelectListItem>();
    var books = Enumerable.Empty<Book>();
    using (var repository = new CategoryRepository()) {
        categories = repository.GetCategories().Select(c => new SelectListItem {
            Value = c.CategoryId.ToString(),
            Text = c.CategoryName,
            Selected = c.CategoryId == Request["categoryId"].AsInt()
        });
    }

    if (IsPost && Request["categoryId"].IsInt()) {
        using (var repository = new BookRepository()) {
            books = repository.GetBooksByCategory(Request["categoryId"].AsInt());
        }
    }
}

@section featured {
<section class="featured">
    <div class="content-wrapper">
        <hgroup class="title">
            <h1>@Page.Title.</h1>
        </hgroup>
    </div>
</section>
}

<h3>Books</h3>

<form method="post">
    <fieldset>
        <legend>Select Category</legend>
        <div>@Html.DropDownList("categoryId", " --Select Category-- ", categories)</div>
        <button>Select</button>
    </fieldset>
</form>
@if (books.Any()) {
    foreach (var book in books) {
        <div>
            <h3>@book.Title</h3>
            Description: @book.Description<br />
            ISBN: @book.ISBN<br />
            Publication Date: @book.DatePublished.ToLongDateString()<br />
            Author: @book.Author.FirstName @book.Author.LastName<br />
            Category: @book.Category.CategoryName
        </div>
    }
}
Note that the repositories are instantiated in using statements. These are different to using directives. Directives bring namespaces into scope, whereas a using statement ensures the correct use of objects that implement IDisposable. To implement IDisposable, the object must provide a method called Dispose() which should release "unmanaged resources" (i.e. those that the .NET Framework has no control over, such as connections to databases). If you recall, the repositories implement IDisposable. and include a Dispose method that ensures that the context is disposed (DbContexts implement IDisposable) when the repository is no longer needed. When a using statement reaches its closing brace, the object instantiated within it has its Dispose method called in the correct way.
Finally, right click on the Solution name in Solution Explorer and select Build Solution, or just press Shift + Ctrl + B. Assuming that both projects built successfully, BooksData.dll and the EntityFramework.dll files will have copied to the bin folder of the site and it is ready to launch.
Migrations is an extremely helpful addition to Code First development, and this article looked at how to take advantage of them as a Web Pages developer.
The source code for the BooksData class library is available on gitHub as is the sample site that makes use of it.
