Order Form and Mail Service
The final two parts of the migration involve the creation of the order form and the mailing service. The order part of the system will require the following:
- An
Orderclass to represent an order from a customer - A view model for use with the order form
- An
OrderControllerto prepare the order form view and to accept submitted orders - A view containing the order form.
- A view for display when order submission is successful
The Order class encapsulates details about an order.
namespace Bakery.Models
{
    public class Order
    {
        public Product Product { get; set; }
        public int Quantity { get; set; }
        public string ShippingAddress { get; set; }
        public string EmailAddress { get; set; }
    }
}
The OrderFormModel is a view model that represents the order form UI:
using System.ComponentModel.DataAnnotations;

namespace Bakery.Models
{
    public class OrderFormModel
    {
        public int ProductId { get; set; }
        public int OrderQty { get; set; }
        [Required]
        public string OrderShipping { get; set; }
        [Required(ErrorMessage="You must provide an email address.")]
        public string OrderEmail { get; set; }
    }
}
Where is differs from the previous view model is in the fact that it incorporates an element of validation. This is included via the use of DataAnnotation attributes. The OrderShipping property is decorated with the Required attribute as is the OrderEmail property. The OrderEmail property is also provided with a custom error message. The OrderShipping property makes do with the default error message for the Required attribute which is "This field is required". The validators work in much the same way as the Validation helpers in Web Pages: when used with Html helpers and the jQuery unobtrusive validation library, they provide client-side validation without any additional effort on your part. They also provide server-side validation.
Model Binding
The property names in the view model are designed to match the field names from the original form in the Bakery template. This is deliberate as it allows the application to take advantage of Model Binding, which is a process whereby values passed in a request are matched to variables or objects based on the name attribute of the form field and the property or variable names. I will cover how this works in a bit more detail soon. In the meantime we need a new route definition.
The "Order Now" links in the home page point to /order/id_of_product. No route definition caters for this pattern so one needs to be added. In addition we want to make sure that only numbers are accepted for the {id} parameter. There are two ways to add this route definition. The first is to make another call to MapRoute in the App_Start\RouteConfig.cs file like so:
routes.MapRoute(
    "Order",
    "order/{id}",
    new { controller = "Order", action = "Index" },
    constraints: new { id = "\\d+" }
    );
The anonymous type passed in to the constraints parameter contains a regular expression that constrains the parameter to numbers only. There is nothing wrong with this approach, but MVC 5 introduced a new option: Attribute-based Routing, where routes are defined using attributes on controller actions. Attribute-based routing is not enabled by default. You enable it by adding the highlighted line of code to the RegisterRoutes method:
public static void RegisterRoutes(RouteCollection routes)
{
    routes.IgnoreRoute("{resource}.axd/{*pathInfo}");

    routes.MapMvcAttributeRoutes();
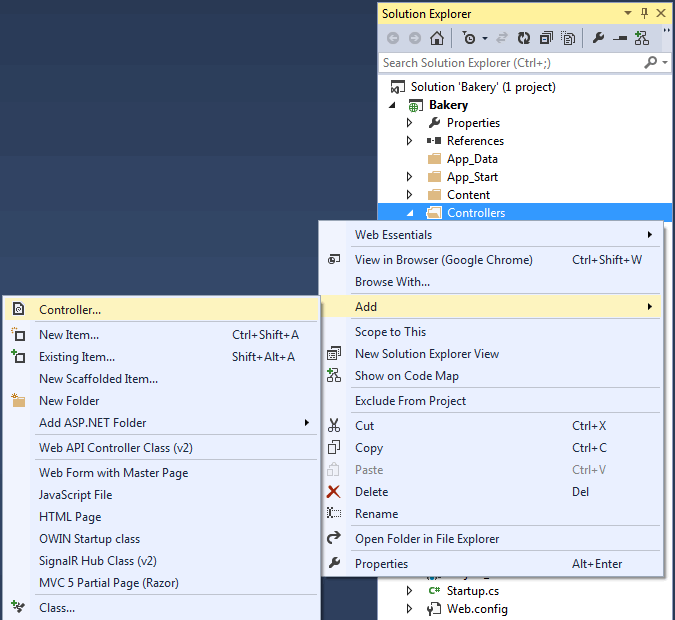
The next step is to add the OrderController class. Right click on the Controllers folder and choose Add » Controller
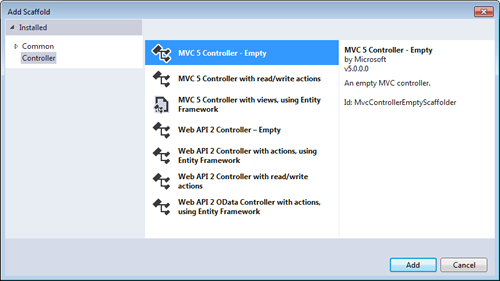
Choose MVC 5 Controller - Empty from the options
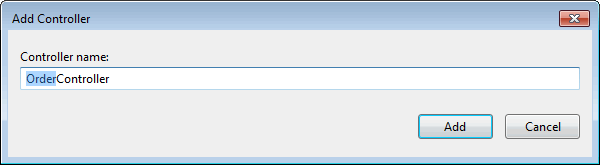
Name the class OrderController.cs
Replace the default code with the following:
using Bakery.Models;
using Bakery.Services;
using System.Web.Mvc;

namespace Bakery.Controllers
{
    public class OrderController : Controller
    {
        //
        // GET: /Order/
        [Route("order/{id:int}")]
        public ActionResult Index(int id)
        {
            ViewBag.Title = "Place Your Order";
            IProductsService service = new ProductsService();
            OrderFormModel model = new OrderFormModel {
                Product = service.GetProduct(id)
            };
            return View(model);
        }
    }
}
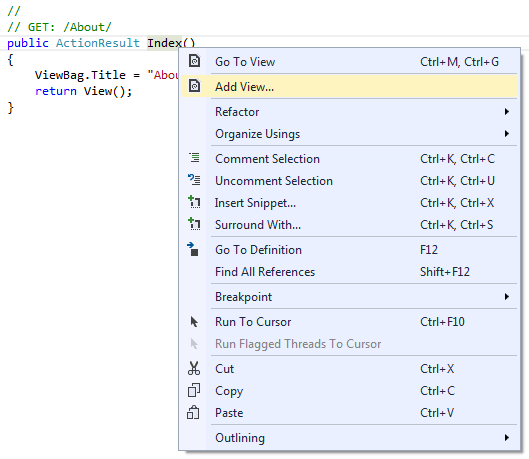
The route is defined in the Route attribute place just before the Index method. The contstraint is specified in the curly braces. When you click on an Order Now link, the id of the product you want to order is passed in to the Index method as a parameter. The method creates a new OrderFormModelProduct property to the product represented by the id value passed in. This is obtained from the database by the ProductService. The OrderFormModel instance is passed to the View, which needs to be created next. A quick way to do this is to right click in the Index method in the controller and choose Add View...
Choose Empty from the Template selection and OrderFormModel from the Model selection:
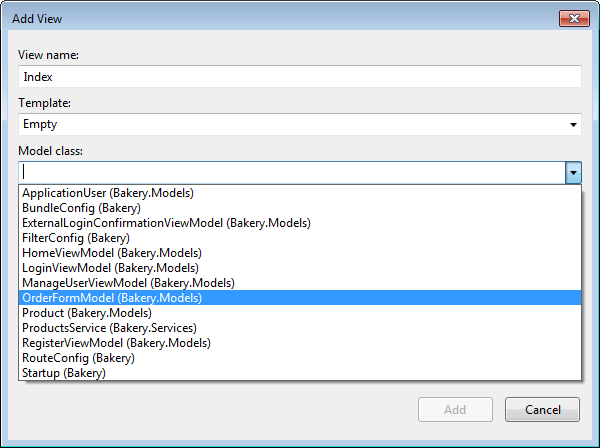
This ensures that the view is strongly typed. Now you can copy and paste the HTML and Razor (the section below the code block at the top) from the Order.cshtml file in the WebMatrix Bakery site, making the few highlighted alterations shown below:
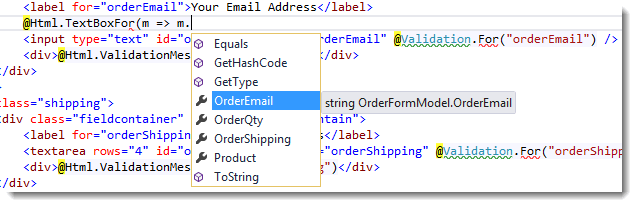
@model Bakery.Models.OrderFormModel <ol id="orderProcess"> <li><span class="step-number">1</span>Choose Item</li> <li class="current"><span class="step-number">2</span>Details & Submit</li> <li><span class="step-number">3</span>Receipt</li> </ol> <h1>Place Your Order: @Model.Product.Name</h1> <form action="" method="post"> @Html.ValidationSummary() <fieldset class="no-legend"> <legend>Place Your Order</legend> <img class="product-image order-image" src="~/Images/Products/Thumbnails/@Model.Product.ImageName" alt="Image of @Model.Product.Name" /> <ul class="orderPageList" data-role="listview"> <li> <div> <p class="description">@Model.Product.Description</p> </div> </li> <li class="email"> <div class="fieldcontainer" data-role="fieldcontain"> <label for="orderEmail">Your Email Address</label> @Html.TextBoxFor(m => m.OrderEmail) <div>@Html.ValidationMessageFor(m => m.OrderEmail)</div> </div> </li> <li class="shipping"> <div class="fieldcontainer" data-role="fieldcontain"> <label for="orderShipping">Shipping Address</label> @Html.TextAreaFor(m => m.OrderShipping, new { rows = 4 }) <div>@Html.ValidationMessageFor(m => m.OrderShipping)</div> </div> </li> <li class="quantity"> <div class="fieldcontainer" data-role="fieldcontain"> <label for="orderQty">Quantity</label> <input type="text" id="orderQty" name="orderQty" value="1" /> x <span id="orderPrice">@string.Format("{0:f}", Model.Product.Price)</span> = <span id="orderTotal">@string.Format("{0:f}", Model.Product.Price)</span> </div> </li> </ul> <p class="actions"> <input type="hidden" name="Product.Id" value="@Model.Product.Id" /> <input type="submit" value="Place Order" data-role="none" data-inline="true" /> </p> </fieldset> </form> @section Scripts { <script src="~/Scripts/jquery.validate.min.js"></script> <script src="~/Scripts/jquery.validate.unobtrusive.min.js"></script> <script type="text/javascript"> $(function () { var price = parseFloat($("#orderPrice").text()).toFixed(2), total = $("#orderTotal"), orderQty = $("#orderQty"); orderQty.change(function () { var quantity = parseInt(orderQty.val()); if (!quantity || quantity < 1) { orderQty.val(1); quantity = 1; } else if (quantity.toString() !== orderQty.val()) { orderQty.val(quantity); } total.text("$" + (price * quantity).toFixed(2)); }); }); </script> }
The changes bring in the MVC Html form helpers and the MVC version of the validation helper. Each of the helpers look similar to their Web Pages counterpart, except that they have For at the end of their name: TextAreaFor, ValidationMessageFor etc. These are strongly type helpers and work with the model.
When the form is submitted, an email is generated and sent to the user. The next stage is to create a service that takes care of this. The service will only have one method to start - SendOrderConfirmation. It will take an Order object as a parameter. Add a new class to the Models folder and name it Order.cs. Then place the following code in it:
namespace Bakery.Models
{
    public class Order
    {
        public Product Product { get; set; }
        public int Quantity { get; set; }
        public string ShippingAddress { get; set; }
        public string EmailAddress { get; set; }
    }
}
Add a new Interface to the Services folder like you did for the ProductService. Name this one IMailService.cs and replace the code with the following:
using Bakery.Models;

namespace Bakery.Services
{
    public interface IMailService
    {
        void SendOrderConfirmation(Order order);
    }
}
Add a class file to the Services folder, name it MailService.cs and replace the existing code with the following:
using Bakery.Models;
using System;
using System.Web.Helpers;

namespace Bakery.Services
{
    public class MailService : IMailService
    {
        public void SendOrderConfirmation(Order order)
        {
            var body = "Thank you, we have received your order for " + order.Quantity + " unit(s) of " + order.Product.Name + "!<br/>";
            var orderShipping = order.ShippingAddress;
            var customerEmail = order.EmailAddress;

                //Replace carriage returns with HTML breaks for HTML mail
                var formattedOrder = orderShipping.Replace("\r\n", "<br/>");
                body += "Your address is: <br/>" + formattedOrder + "<br/>";

            body += "Your total is $" + (order.Product.Price * order.Product.Price) + ".<br/>";
            body += "We will contact you if we have questions about your order.  Thanks!<br/>";

            try {
                //SMTP Configuration for Hotmail
                WebMail.SmtpServer = "smtp.live.com";
                WebMail.SmtpPort = 25;
                WebMail.EnableSsl = true;

                //Enter your Hotmail credentials for UserName/Password and a "From" address for the e-mail
                WebMail.UserName = "";
                WebMail.Password = "";
                WebMail.From = "";
                WebMail.Send(to: customerEmail, subject: "Fourth Coffee - New Order", body: body);
            }
            catch (Exception) {
                // only placed here to allow app to run without configuring email
            }
        }
    }
}
The body of the SendOrderConfirmation method features code lifted straight out of the IsPost block at the top of the Order.cshtml file in the WebMatrix Bakery template. The method accepts an object of type Order, which encapsulates details of the current order. Then it creates an email and takes care of sending it.
Before that can happen, something needs to create an instance of the MailService and pass and order to it. The OrderService will be responsible for that. Add another interface to the Services folder and name it IOrderService.cs. Amend the contents of the file so that it looks like the code below.
using Bakery.Models;
namespace Bakery.Services
{
    public interface IOrderService
    {
        void ProcessOrder(Order order);
    }
}
Add another class file to the Services folder and name it OrderService.cs. Alter the code so that it matches the code in the next section:
using Bakery.Models;

namespace Bakery.Services
{
    public class OrderService : IOrderService
    {
        public void ProcessOrder(Order order)
        {
            IMailService service = new MailService();
            service.SendOrderConfirmation(order);
        }
    }
}
Now you have an OrderService which is based on an IOrderService interface containing one method that accepts an Order object, instantiates an instance of the MailService you created earlier and passes the Order object on to it.
Finally, add the following method to the OrderController:
[HttpPost]
[Route("order/{id:int}")]
public ActionResult Index(OrderFormModel model)
{
    if (ModelState.IsValid)
    {
        Order order = new Order {
            Product = model.Product,
            ShippingAddress = model.OrderShipping,
            EmailAddress = model.OrderEmail,
            Quantity = model.OrderQty
        };
        OrderService service = new OrderService();
        service.ProcessOrder(order);
        return View("Success");
    }
    else
    {
        if (model.Product.Id > 0)
        {
            ProductsService service = new ProductsService();
            model = new OrderFormModel {
                Product = service.GetProduct(model.Product.Id)
            };
            return View(model);
        }
        else
        {
            return RedirectToRoute("Default");
        }
    }
}
The new Index method is decorated with the same route attribute as the existing method, but this one also features an additional attribute: HttpPost. In other words, this method has been marked to accept only POST requests (form submissions). This method also expects an OrderFormModel to be passed to it. Model Binding will examine the OrderFormModel type, and for each public property on the type, it will attempt to find a matching parameter in the Request object. It will apply the value of the matching request parameter to the property of the model variable. The ModelState.IsValid test is the MVC equivalent to the Web Pages Validation.IsValid() method. It tests the OrderFormModel to ensure that it meets the validation rules applied to it. The Order object is constructed from the validated view model and then passed to the OrderService.
Note: At this stage you might be wondering why you had to basically clone the property values from the OrderFormModel object that came in with the request to an Order object that looks pretty similar, and then pass that to the OrderService. Why not alter the OrderService.ProcessOrder method to accept an OrderFormModel type instead and do without the Order class altogether? The answer to this is separation of concerns. View models (despite thier name) are part of the presentation layer, and can only travel between the controller and the view. You should have a view model-repellant fence around your model - view models should not be allowed to get in, and since the services are part of your Model layer, they cannot accept view models as parameters.
If the view model fails validation, the product details are retrieved again and redisplayed in the form along with any validation errors. Once the order has been successfully processed, the user is shown the Success view. The content of the view is lifted directly from the WebMatrix site and is shown below.
<ol id="orderProcess"> <li><span class="step-number">1</span>Choose Item</li> <li><span class="step-number">2</span>Details & Submit</li> <li class="current"><span class="step-number">3</span>Receipt</li> </ol> <h1>Order Confirmation</h1> <div class="message order-success"> <h2>Thank you for your order!</h2> <p>We are processing your order and have sent a confirmation email. Thank you for your business and enjoy!</p> </div>
The view itself differs from the previous views in that it doen't have a corresponding action method in the controller. It is added directly to the Views\Order folder.
Summary
This series of tutorials has taken you through the process of migrating a Razor Web Pages site to an ASP.NET MVC site. You have been shown how views are constructed from the mark-up section of your existing .cshtml files, and how to migrate the logic at the top of the page into the Model, keeping a clear separation beween different operations. You have also been given a basic introduction to the moving parts in MVC, and have a working application. It should be noted that the approach taken to code organisation in this tutorial is just a start. For example, you have been introduced to the idea of interfaces, but their real value hasn't been demonstrated in this article. That may form a topic for another day.
