The Model
In the first part of the tutorial, I mentioned that the Model is a catch-all area for server side logic. Server-side logic in the Bakery site covers a number of different activities (or "concerns", as they can be referred to). These include data access, validation and sending email. There are many ways to organise this type of code, and the approach that you adopt will be largely driven by your own preference. This migration will show how to move the data access code from using the WebMatrix Database helper over to using the Entity Framework instead.
You might ask whether you can stick with the Database helper in MVC, and the truth is that you can. However, if you want to continue writing SQL and using the dynamic results from queries, you should really question your reasons for moving to MVC. Ideally, you want as much of your application to be strongly typed as possible so that you can catch errors at compile time (while you are typing in Visual Studio) rather than at runtime. The Entity Framework delivers a strongly typed approach to data access and is the recommended way to work with data in ASP.NET.
Introducing Entity Framework to the Bakery application
All MVC applications created using the Visual Studio template include Entity Framework by default. However, they may not include the latest version of the framework so the first thing to do is to update it.
-
Locate the Package Manager Console (PMC) by going to Tools » Library Package Manager » Package Manager Console. Once the
PMprompt appears, typeInstall-Package EntityFramework
-
Next, making sure you have copied the Bakery.sdf database file from the original site to the App_Data folder of the MVC application, add the following connection string to the web.config file. Make sure you add this to the web.config in the root folder, not the one in the Views folder.
<add name="BakeryContext" connectionString="Data Source=|DataDirectory|Bakery.sdf;Persist Security Info=False" providerName="System.Data.SqlServerCe.4.0"/>
-
You need a class to represent a product from the database so that Entity Framework can map the result of a database query to C# code. Add a new Class file to the Models folder and name it Product.cs. Replace the default code with the following:
using System.ComponentModel.DataAnnotations;

namespace Bakery.Models
{
    public class Product
    {
        public int Id { get; set; }
        [StringLength(50)]
        public string Name { get; set; }
        [StringLength(1000)]
        public string Description { get; set; }
        public decimal Price { get; set; }
        [StringLength(50)]
        public string ImageName { get; set; }
    }
}
The properties of the
Productclass mirror the fields in the Products table in the database. Data Annotation attributes have been used to set the maximum length of the string fields. These attributes provide validation out-of-the-box, and are also used by Entity Framework Migrations to set the field length in the database. You can read more about EF migrations in one of my previous articles.Namespaces: Visual Studio has automatically added a namespace statement to the
Productclass. The class has been placed in a namespace calledBakery.Models, which takes the formProjectName.Folder. Namespaces are used to organise code. They disambiguate between classes with the same name in different areas of a project. You might decide to name a classDatabase, because that helps to define objects in your application. You might also need to use theWebMatrix.Data.Databaseclass in the same scope as yourDatabaseclass. You use the fully qualified name including the namespace so that it is clear whichDatabaseclass you are referring to. -
Create a folder in the root of the application and name it DataAccess. Add a new class file called BakeryContext.cs and replace the default code with the following:
using Bakery.Models;
using System.Data.Entity;

namespace Bakery.DataAccess
{
    public class BakeryContext : DbContext
    {
        public BakeryContext()
            : base() { }

        public DbSet<Product> Products { get; set; }
    }
}
This file is the
DbContextfor the Entity Framework. It takes the same name as the connection string you added earlier, and has one property:Productsof typeDbSet<Product>, representing the Products table in the database. Notice that the namespace takes after the folder you created. Although part of the Model, this file has not been placed in the Models folder. The contents of theBakery.DataAccessnamespace form the Data Access Layer of the application.
Adding a Service Layer
Now that the data access layer has been created, you could just instantiate a DbContext in the controller and use LINQ to query its DbSet<Product> to get data to send to Views. However, that would result on the controller having a dependency on the data access layer. In time, it will also lead to "code-bloat" in the controller as you start adding validation and other logic to your action methods. Your controller will end up looking like a collection of code blocks from your Web Pages site, which is not what you want. You won't actually be separating anything. What you will do instead is create a Service Layer. This will consist of a set of classes - roughly one per entity or activity - which will be responsible for talking to your data access layer (EF) and delivering data to the controller so that it can pass it on to the view. It will also accept data from your controller and do whatever it needs to with it. This could include creating new database records, updating existing ones or deleting them. In the case of the Bakery site, it will generate an email in response to an order being placed.
-
Create a new folder in the root of the application called Services.
-
Add a new class file to the Services folder called ProductService.cs and replace the default code with the following:
using Bakery.DataAccess;
using Bakery.Models;
using System.Collections.Generic;
using System.Linq;

namespace Bakery.Services
{
    public class ProductService : IProductService
    {
        public List<Product> GetProducts()
        {
            using (BakeryContext context = new BakeryContext())
            {
                return context.Products.ToList();
            }
        }

        public Product GetProduct(int id)
        {
            using (BakeryContext context = new BakeryContext())
            {
                return context.Products.Find(id);
            }
        }
    }
}
-
Add another new item to the folder. This time you may need to navigate to the Visual C# » Code node on the left hand side to find the correct file type, which is Interface.
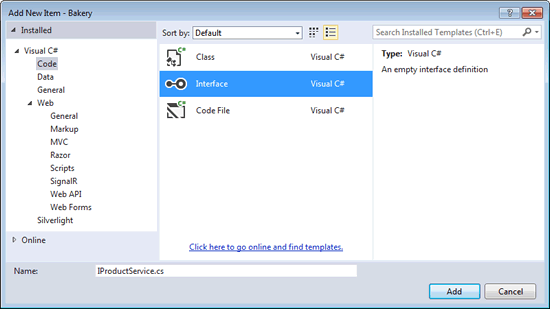
Name the interface IProductService.cs and replace the default code with the following:
using Bakery.Models;
using System.Collections.Generic;

namespace Bakery.Services
{
    public interface IProductService
    {
        List<Product> GetProducts();
        Product GetProduct(int id);
    }
}
Interfaces are one of the key mechanisms for code separation. They introduce a level of loose coupling by allowing you to programme against an idea rather than a concrete implementation of that idea. The interface is the idea. It represents something that implements both a
GetProductsmethod which returns aList<Product>, and aGetProductmethod that returns a specificProductobject based on theidvalue passed in. TheProductServiceclass meets these expectations and is therefore a concrete representation of the interface. It is actually forced to meet the expectations set out by the interface as theProductServiceclass specifically implements the interface. You can have other classes implement the interface and they can be swapped in and out quite easily - especially if you use dependency injection. This is particularly useful if you want to implement unit testing. You can swap theProductServicewith aTestProductServicethat implements the same interface with minimal changes to other code. Then when you run your tests, theTestProductServicewill be used instead of a class that hits the database - protecting the integrity of your data and speeding your tests up. Dependency injection is not used in this tutorial but you can learn more about it from an earlier article.Now you have a service that returns a list of products and a single product. You can use the first of these methods to generate the data for the home page of the site, which features all the products. You can do this by making the highlighted changes to the HomeController
using Bakery.Services;
using System;
using System.Web.Mvc;

namespace Bakery.Controllers
{
    public class HomeController : Controller
    {
        public ActionResult Index()
        {
            ViewBag.Title = "Home";
            IProductService service = new ProductService();
            ViewBag.Products = service.GetProducts();
            ViewBag.Featured = ViewBag.Products[new Random().Next(ViewBag.Products.Count)];
            return View();
        }

        public ActionResult About()
        {
            ViewBag.Title = "About";

            return View();
        }
    }
}
Replace the code in the Views\Home\Index.cshtml file with the following:
<h1>Welcome to Fourth Coffee!</h1>

<div id="featuredProduct">
    <img alt="Featured Product" src="~/Images/Products/@ViewBag.Featured.ImageName" />
    <div id="featuredProductInfo">
        <div id="productInfo">
            <h2>@ViewBag.Featured.Name</h2>
            <p class="price">$@string.Format("{0:f}", ViewBag.Featured.Price)</p>
            <p class="description">@ViewBag.Featured.Description</p>
        </div>
        <div id="callToAction">
            <a class="order-button" href="~/order/@ViewBag.Featured.Id" title="Order @ViewBag.Featured.Name">Order Now</a>
        </div>
    </div>
</div>

<div id="productsWrapper">
    <ul id="products" data-role="listview" data-inset="true">
        @foreach (var p in ViewBag.Products)
        {
            <li class="product">
                <a href="~/order/@p.Id" title="Order @p.Name">
                    <img class="hide-from-desktop" src="~/Images/Products/Thumbnails/@p.ImageName" alt="Image of @p.Name" />

                    <div class="productInfo">
                        <h3>@p.Name</h3>
                        <img class="product-image hide-from-mobile" src="~/Images/Products/Thumbnails/@p.ImageName" alt="Image of @p.Name" />
                        <p class="description">@p.Description</p>
                        <p class="price hide-from-desktop">$@string.Format("{0:f}", p.Price)</p>
                    </div>
                </a>

                <!-- Desktop only -->
                <div class="action  hide-from-mobile">
                    <p class="price">$@string.Format("{0:f}", p.Price)</p>
                    <a class="order-button" href="~/order/@p.Id" title="Order @p.Name">Order Now</a>
                </div>

            </li>
        }
    </ul>
</div>
This is essentially the code from the Default.cshtml file in the Bakery template site. If you run the applciation now, you should see an identical result to the one you get when running the WebMatrix site. I don't know whether you noticed, but there was little to no Intellisense or code completion in the view. If you hover over any of the model properties, like ViewBag.Featured.Name, Intellisense only reveals that the data type is a dynamic expression which will be resolved at runtime.

ViewBagPage in Web Pages. It would be much better to get strong typing in views so that you can capture potential typing errors at compile time rather than runtime. That's what view models are for.
View Models
A view model is a class that serves as a container for data for a view. The home page view features two pieces of data - all products and a featured product. The following class represents the two pieces of data. The Featured property represents an item from the Products collection taken at random. It is possible to just pass the collection of products to the view and then to generate featured product there, but the recommended approach is to keep that kind of logic out of the view, which is why it's done in the view model instead.
using System;
using System.Collections.Generic;

namespace Bakery.Models
{
    public class HomeViewModel
    {
        public List<Product> Products { get; set; }
        public Product Featured {
            get {
                return Products[new Random().Next(Products.Count)];
            }
        }
    }
}
The next section of code shows how the view model is instantiated, populated and then passed to the view
using Bakery.Models;
using Bakery.Services;
using System;
using System.Web.Mvc;

namespace Bakery.Controllers
{
    public class HomeController : Controller
    {
        public ActionResult Index()
        {
            ViewBag.Title = "Home";

            ProductsService service = new ProductsService();
            HomeViewModel model = new HomeViewModel
            {
                Products = service.GetProducts()
            };
            return View(model);
        }

        public ActionResult About()
        {
            ViewBag.Title = "About";

            return View();
        }
    }
}
Finally, the revised view is shown here.
@model Bakery.Models.HomeViewModel

<h1>Welcome to Fourth Coffee!</h1>

<div id="featuredProduct">
    <img alt="Featured Product" src="~/Images/Products/@Model.Featured.ImageName" />
    <div id="featuredProductInfo">
        <div id="productInfo">
            <h2>@Model.Featured.Name</h2>
            <p class="price">$@string.Format("{0:f}", Model.Featured.Price)</p>
            <p class="description">@Model.Featured.Description</p>
        </div>
        <div id="callToAction">
            <a class="order-button" href="~/order/@Model.Featured.Id" title="Order @Model.Featured.Name">Order Now</a>
        </div>
    </div>
</div>

<div id="productsWrapper">
    <ul id="products" data-role="listview" data-inset="true">
        @foreach (var p in Model.Products)
        {
            <li class="product">
                <a href="~/order/@p.Id" title="Order @p.Name">
                    <img class="hide-from-desktop" src="~/Images/Products/Thumbnails/@p.ImageName" alt="Image of @p.Name" />

                    <div class="productInfo">
                        <h3>@p.Name</h3>
                        <img class="product-image hide-from-mobile" src="~/Images/Products/Thumbnails/@p.ImageName" alt="Image of @p.Name" />
                        <p class="description">@p.Description</p>
                        <p class="price hide-from-desktop">$@string.Format("{0:f}", p.Price)</p>
                    </div>
                </a>

                <!-- Desktop only -->
                <div class="action  hide-from-mobile">
                    <p class="price">$@string.Format("{0:f}", p.Price)</p>
                    <a class="order-button" href="~/order/@p.Id" title="Order @p.Name">Order Now</a>
                </div>

            </li>
        }
    </ul>
</div>
The view features an @model statement at the top that specifies the data type of the view model being passed in to the view. Since the view is now strongly type, full Intellisense is available.
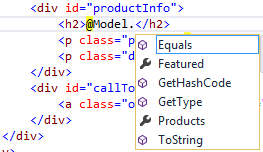
This approach helps to minimise runtime errors arising from typos, and makes the views and controller cleaner.
Summary
In this section, you have seen how to create view models to give you strong typing in your views, making development less error prone. You have also moved your data access away from the dynamic-based Database helper over to the Entity Framework with the same benefits as provided by view models. In the final section, you will combine view models and model binding to simplify the process of posting data to the server. You will also complete the implementation of the service layer with components for processing submitted orders.
