First, I only cover creating emails to be sent via SMTP (Simple Mail Transfer Protocol) in this article. There are many other ways to send email - POP3, IMAP, Exchange Web Services, Outlook Interop and so on. None of those will be covered here. The .NET framework includes a library specifically for sending email via SMTP. It is found in the System.Net.Mail namespace, and includes the key classes that enable the creation of an email message, and passing it to an SMTP server for sending. Before you can do anything with them, you need access to an SMTP service. Your ISP may already provide you with access, but if not, you can easily get access via any number of free services such as Google's Gmail system, Microsoft's Outlook.com/Live service, one provided by Yahoo and so on.
Basic Email Sending
The most common use for email in a web setting is to enable visitors to provide feedback or make contact with the site owners via a form. The following steps will walk you through creating a new MVC 5 application, adding a view model and view, and then creating an action method to process a form submission to generate an email.
-
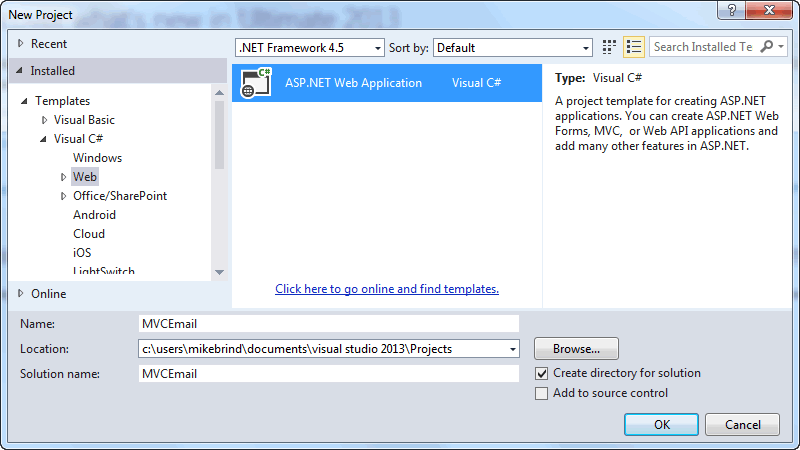
Open Visual Studio and from the New Project link, or File » New » Project, create a new project. Select ASP.NET Web Application from the C# templates and click OK.
-
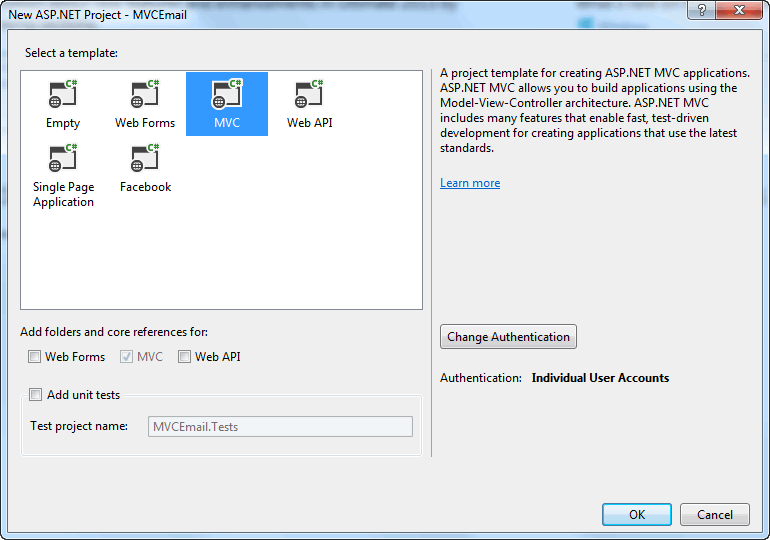
Choose MVC and click OK, leaving the other options as the are.
-
Add a new class file to the Models folder and name it EmailFormModel.cs. Replace the existing code with the following:
using System.ComponentModel.DataAnnotations;

namespace MVCEmail.Models
{
    public class EmailFormModel
    {
        [Required, Display(Name="Your name")]
        public string FromName { get; set; }
        [Required, Display(Name = "Your email"), EmailAddress]
        public string FromEmail { get; set; }
        [Required]
        public string Message { get; set; }
    }
}
-
Locate the Contact.cshtml file in the Views\Home folder and replace the existing code with the following:
@model MVCEmail.Models.EmailFormModel
@{
    ViewBag.Title = "Contact";
}
<h2>@ViewBag.Title.</h2>

@using (Html.BeginForm())
{
    @Html.AntiForgeryToken()
    <h4>Send your comments.</h4>
    <hr />
    <div class="form-group">
        @Html.LabelFor(m => m.FromName, new { @class = "col-md-2 control-label" })
        <div class="col-md-10">
            @Html.TextBoxFor(m => m.FromName, new { @class = "form-control" })
            @Html.ValidationMessageFor(m => m.FromName)
        </div>
    </div>
    <div class="form-group">
        @Html.LabelFor(m => m.FromEmail, new { @class = "col-md-2 control-label" })
        <div class="col-md-10">
            @Html.TextBoxFor(m => m.FromEmail, new { @class = "form-control" })
            @Html.ValidationMessageFor(m => m.FromEmail)
        </div>
    </div>
    <div class="form-group">
        @Html.LabelFor(m => m.Message, new { @class = "col-md-2 control-label" })
        <div class="col-md-10">
            @Html.TextAreaFor(m => m.Message, new { @class = "form-control" })
            @Html.ValidationMessageFor(m => m.Message)
        </div>
    </div>
    <div class="form-group">
        <div class="col-md-offset-2 col-md-10">
            <input type="submit" class="btn btn-default" value="Send" />
        </div>
    </div>
}

@section Scripts {
    @Scripts.Render("~/bundles/jqueryval")
}
Add these
usingdirectives to the top of the HomeController.cs file:using MVCEmail.Models; using System.Net; using System.Net.Mail;
-
Add the following asynchronous
Contactmethod to the HomeController.cs file, replacing settings with valid values where indicated by comments:[HttpPost] [ValidateAntiForgeryToken] public async Task<ActionResult> Contact(EmailFormModel model) { if (ModelState.IsValid) { var body = "<p>Email From: {0} ({1})</p><p>Message:</p><p>{2}</p>"; var message = new MailMessage(); message.To.Add(new MailAddress("[email protected]")); // replace with valid value message.From = new MailAddress("[email protected]"); // replace with valid value message.Subject = "Your email subject"; message.Body = string.Format(body, model.FromName, model.FromEmail, model.Message); message.IsBodyHtml = true; using (var smtp = new SmtpClient()) { var credential = new NetworkCredential { UserName = "[email protected]", // replace with valid value Password = "password" // replace with valid value }; smtp.Credentials = credential; smtp.Host = "smtp-mail.outlook.com"; smtp.Port = 587; smtp.EnableSsl = true; await smtp.SendMailAsync(message); return RedirectToAction("Sent"); } } return View(model); }
-
Add the following
ActionResultto HomeController.cs:public ActionResult Sent() { return View(); }
-
Navigate to Views\Home and add a new view called Sent.cshtml. Replace the content with the following:
@{
    ViewBag.Title = "Sent";
}
<h2>Your message has been sent</h2>
You start by creating a MailMessage object. MailMessage is the class that represents an email to be sent. Recipients are represented as a collection of MailAddress objects. They are added to the To property of the MailAddress class. The sender is also represented as an instance of the MailAddress class and is assigned to the message's From property. The Subject and Body properties are self-explanatory. By default, email messages are created as plain text. If you want to send an HTML email, you pass HTML to the Body property (as in this example) and then explicitly set the IsBodyHtml property to true.
Once the message has been created, it needs sending. The SmtpClient class is responsible for that task. The configuration of the SmtpClient object is often the place where most email sending errors occur, so it is important to ensure that you use the right settings. They are almost identical for both Outlook and Gmail:
| Gmail | Outlook/Live | |
|---|---|---|
| Host | smtp.gmail.com | smtp-mail.outlook.com |
| Port | 587 | 587 |
| EnableSsl | true | true |
| User Name | Your email address | Your email address |
| Password | Your account password | Your account password |
You should check your provider's documentation for the correct values if you aren't using either of the services featured here.
Port 465 or 587?
Lots of code samples for Gmail feature port 465 but most people cannot get this to work. When they revert to port 587, their email suddenly works. According to Gmail's documentation SSL is required if you specify port 465. Many people think that setting EnableSsl to true achieves this, but in fact, it means that your app must be running under https. When you set EnableSsl to true, you actually switch TLS on, which is required for port 587. Https is not supported by the SmtpClient object. For more details, read the Remarks section of the docs on MSDN.
The user name and password are packaged up in an instance of the NetworkCredential class and passed to the Credentials property of the SmtpClient class. Then the mail is sent asynchronously using the SendMailAsync method.
Synchronous or Asynchronous?
The majority of code examples that illustrate using .NET libraries to send email will result in the email being sent synchronously via the SmptClient.Send() method. A web server has a limited number of threads available, and in high load situations all of the available threads might be in use. When that happens, the server can’t process new requests until the threads are freed up. With synchronous code, many threads may be tied up while they aren’t actually doing any work because they’re waiting for I/O (calls to external processes) to complete. With asynchronous code, when a process is waiting for I/O to complete, its thread is freed up for the server to use for processing other requests. As a result, asynchronous code enables server resources to be used more efficiently, and the server can handle more traffic with fewer delays.
In earlier versions of .NET, writing and testing asynchronous code was complex, error prone, and hard to debug. In .NET 4.5, writing, testing, and debugging asynchronous code is so much easier that you should generally write asynchronous code unless you have a reason not to. Asynchronous code does introduce a small amount of overhead, but for low traffic situations the performance hit is negligible, while for high traffic situations, the potential performance improvement is substantial.
Finally, you should be able to run the application by pressing F5, navigate to the Contact page and submit the form once you have provided some valid values.
Move settings to web.config
The code above is fine, but there is a potential problem. If you want to change the mail account that you are using, you need to make changes to source code. And that means a recompile and so on. Equally, if you want to send email from other parts of the application, you have to update the settings in multiple locations. One way to solve this problem is to move the settings into the web.config file. The system.net element includes a child element called mailSettings which is designed to support the storage of settings for sending email. the following block will go into the <configuration> section:
<system.net>
  <mailSettings>
    <smtp from="[email protected]">
      <network host="smtp-mail.outlook.com"
               port="587"
               userName="[email protected]"
               password="password"
               enableSsl="true" />
    </smtp>
  </mailSettings>
</system.net>
Doing this reduces the amount of code you need to use in the Action method. Here's a revised version of the code you added earlier:
[HttpPost]
[ValidateAntiForgeryToken]
public async Task<ActionResult> Contact(EmailFormModel model)
{
    if (ModelState.IsValid)
    {
        var body = "<p>Email From: {0} ({1})</p><p>Message:</p><p>{2}</p>";
        var message = new MailMessage();
        message.To.Add(new MailAddress("[email protected]")); //replace with valid value
        message.Subject = "Your email subject";
        message.Body = string.Format(body, model.FromName, model.FromEmail, model.Message);
        message.IsBodyHtml = true;
        using (var smtp = new SmtpClient())
        {
            await smtp.SendMailAsync(message);
            return RedirectToAction("Sent");
        }
    }
    return View(model);
}
All of the SMTP configuration has been removed.
Sending to multiple recipients
If the email you want to send is intended for multiple recipients, you can add additional MailAddress objects to the To property of the MailMessage
message.To.Add(new MailAddress("[email protected]"));
message.To.Add(new MailAddress("[email protected]"));
message.To.Add(new MailAddress("[email protected]"));
If you don't want each recipient to see others in the recipient list, you can use the Bcc property and add recipients to that, just like with the To property:
message.Bcc.Add(new MailAddress("[email protected]"));
message.Bcc.Add(new MailAddress("[email protected]"));
message.Bcc.Add(new MailAddress("[email protected]"));
Adding Attachments
The MailMessage Attachments property provides the means to add attach multiple files to a mail message. Files can originate from one of two sources - either physical files stored in the file system, or as streams. If you want to attach a file from the file system, you pass the file path to the Attachment constructor:
message.Attachments.Add(new Attachment(HttpContext.Server.MapPath("~/App_Data/Test.docx")));
Attachments can be generated from stream objects. The two most common source of streams that represent files to be attached to email messages are uploaded files and files stored in a database in binary format. In the next section, you will amend the contact form to include a file upload control, and then attach the uploaded file to the email without saving it to the server.
Adding an upload as an attachment
-
Alter the Contact view (Views\Home\Contact.cshtml) to include the changes highlighted in yellow:
@model MVCEmail.Models.EmailFormModel
@{
    ViewBag.Title = "Contact";
}
<h2>@ViewBag.Title.</h2>

@using (Html.BeginForm("Contact", "Home", null, FormMethod.Post, new {enctype = "multipart/form-data"}))
{
    @Html.AntiForgeryToken()
    <h4>Send your comments.</h4>
    <hr />
    <div class="form-group">
        @Html.LabelFor(m => m.FromName, new { @class = "col-md-2 control-label" })
        <div class="col-md-10">
            @Html.TextBoxFor(m => m.FromName, new { @class = "form-control" })
            @Html.ValidationMessageFor(m => m.FromName)
        </div>
    </div>
    <div class="form-group">
        @Html.LabelFor(m => m.FromEmail, new { @class = "col-md-2 control-label" })
        <div class="col-md-10">
            @Html.TextBoxFor(m => m.FromEmail, new { @class = "form-control" })
            @Html.ValidationMessageFor(m => m.FromEmail)
        </div>
    </div>
    <div class="form-group">
        @Html.LabelFor(m => m.Message, new { @class = "col-md-2 control-label" })
        <div class="col-md-10">
            @Html.TextAreaFor(m => m.Message, new { @class = "form-control" })
            @Html.ValidationMessageFor(m => m.Message)
        </div>
    </div>
    <div class="form-group">
        @Html.LabelFor(m => m.Upload, new { @class = "col-md-2 control-label" })
        <div class="col-md-10">
            <input type="file" name="upload" />
        </div>
    </div>
    <div class="form-group">
        <div class="col-md-offset-2 col-md-10">
            <input type="submit" class="btn btn-default" value="Send" />
        </div>
    </div>
}

@section Scripts {
    @Scripts.Render("~/bundles/jqueryval")
}
-
Alter the
EmailFormModelto incorporate the highlighted line:using System.ComponentModel.DataAnnotations; using System.Web; namespace MVCEmail.Models { public class EmailFormModel { [Required, Display(Name="Your name")] public string FromName { get; set; } [Required, Display(Name = "Your email"), EmailAddress] public string FromEmail { get; set; } [Required] public string Message { get; set; } public HttpPostedFileBase Upload { get; set; } } }
-
Add the highlighted code to the
HttpPostContactaction method in theHomeController[HttpPost] [ValidateAntiForgeryToken] public async Task<ActionResult> Contact(EmailFormModel model) { if (ModelState.IsValid) { var body = "<p>Email From: {0} ({1})</p><p>Message:</p><p>{2}</p>"; var message = new MailMessage(); message.To.Add(new MailAddress("[email protected]")); //replace with valid value message.Subject = "Your email subject"; message.Body = string.Format(body, model.FromName, model.FromEmail, model.Message); message.IsBodyHtml = true; if (model.Upload != null && model.Upload.ContentLength > 0) { message.Attachments.Add(new Attachment(model.Upload.InputStream, Path.GetFileName(model.Upload.FileName))); } using (var smtp = new SmtpClient()) { await smtp.SendMailAsync(message); return RedirectToAction("Sent"); } } return View(model); }
-
Build the application and run it (F5). Navigate to the Contact page and upload a file. The email with the uploaded file attached should be generated.
The code that you added to the view provides a file upload control and sets the
enctypeof the form tomultipart/form-data, which is an essential prerequisite to getting files uploaded to the server. You also added an additional property the the view model to cater for the uploaded file. The property is aHttpPostedFileBasetype, which is a class that represents an uploaded file in .NET. In the controller, you check to see if the new property has any value at all before checking itsContentLengthto see if the uploaded file has any data. If it does, your code passes itsInputStreamproperty to theAttachmentconstructor together with the name of the file.
Add attachment from a database
If you store files in a database table, they will be stored as a byte array. You need to convert this to a stream in order to be able to use the Attachment constructor that accepts a stream. In a previous article, I show how to store file content in a database using the Entity Framework. The article features a File entity, with a Content property representing the stored bytes. The following code demonstrates how to retrieve the content for a specific file, convert it to a stream and then create an attachment for your email:
public ActionResult Index(int id)
{
    var file = db.Files.Find(id);
    Attachment attachment;
    using (var stream = new MemoryStream())
    {
        stream.Write(file.Content, 0, file.Content.Length - 1);
        attachment = new Attachment(stream, file.FileName);
    }
    var message = new MailMessage();
    message.Attachments.Add(attachment);

    // etc...
}
Test Configuration
Sometimes you don't want to use an external mail provider when you are just testing your application. But you still need to know that email has been successfully generated. There are SMTP servers available for test purposes, but a simpler approach is to use the SpecifiedPickupDirectory option for the deliveryMethod property. This can be any folder on your system. It's simply a directory where email messages are placed as .eml files when your application generates them. You can specify that this is used in the web.config file:
<system.net>
  <mailSettings>
    <smtp deliveryMethod="SpecifiedPickupDirectory">
      <specifiedPickupDirectory pickupDirectoryLocation="C:\MailDump"/>
    </smtp>
  </mailSettings>
</system.net>
Common Email Sending Errors
The most common problem faced by people sending email from ASP.NET results from getting the SMTP configuration wrong. Usually this happens when people copy and paste code from blog posts without trying to understand it or checking that it does what it is supposed to. The configuration details I have provided for Gmail and Outlook.com are correct at the time this article was published, but that doesn't mean they won't change at some time. You should always check your email provider's documentation.
5.5.1 Authentication Required
This error can arise if you have not authorised your application. Both Gmail and Outlook detect where SMTP connections are coming from, and if you are using a new machine for the first time, you need to confirm that the attempt to send mail programmatically originated from you. Gmail send you an email with instructions on how to do this or display a message at the top of your web-based inbox about potential suspicious activity.
The SMTP server requires a secure connection or the client was not authenticated. The server response was: 5.7.0 Must issue a STARTTLS command first
Usually arises because you have not set EnableSsl to true but your email provider requires you to use TLS. Set the value to true and try again.
Mailbox unavailable. The server response was: 5.7.3 Requested action aborted; user not authenticated
Your user name and/or password is incorrect, or you have specified true for defaultCredentials (web.config or UseDefaultCredentials if setting the SmtpClient object property), which will result in the credentials for the currently logged in user being used to authenticate against the mail server.
Summary
This article covered the basics of sending email from and ASP.NET MVC site. It also looked at how to add attachments from a number of sources. Finally, it covers the most common error messages encountered when sending email programmatically.
