If you haven't already done so, you will need to download the jQuery library. The current version, and therefore the one that is used in this sample is 1.2.6. Then you need to get hold of the files for JCrop. The download also includes a number of samples which show the features offered by JCrop, such as specifying a fixed aspect or minimum and maximum sizes etc, but this sample uses the default out-of-the-box settings. Be sure to get version 0.9.8 or later, as previous versions had trouble working with IE8 when compatability mode is switched off. Finally you could probably do with making sure that your VS 2008 or VWD 2008 has SP1 applied together with this hotfix which enables Intellisense on javascript files, including jQuery and JCrop.
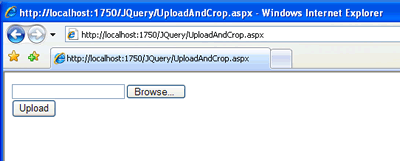
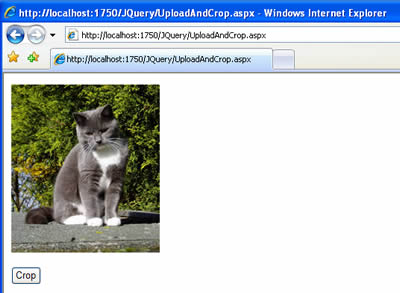
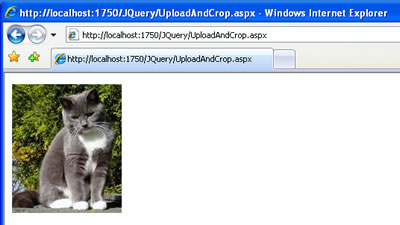
This example consists of a single page. It caters for three actions: first, the user is presented with an Upload control to locate and upload their image; second, they will be presented with their uploaded image ready for cropping; and finally, they are presented with the cropped result. To accommodate this, three Panel controls are added to the page. The first, pnlUpload contains the FileUpload control and a button linked to an event handler for its click event. The second, pnlCrop contains an Image control and a button - again, linked to an event handler for its Click event. It also contains 4 HiddenField controls. They will be explained shortly. The Panel's Visibility is set to false. The final Panel, pnlCropped contains an Image control, and its Visibility is also set to false.
<%@ Page Language="C#" AutoEventWireup="true" CodeFile="UploadAndCrop.aspx.cs" Inherits="UploadAndCrop" %>
<!DOCTYPE html PUBLIC "-//W3C//DTD XHTML 1.0 Transitional//EN" "http://www.w3.org/TR/xhtml1/DTD/xhtml1-transitional.dtd">
<html xmlns="http://www.w3.org/1999/xhtml">
<head runat="server">
<title></title>
</head>
<body>
<form id="form1" runat="server">
<div>
<asp:Panel ID="pnlUpload" runat="server">
<asp:FileUpload ID="Upload" runat="server" />
<br />
<asp:Button ID="btnUpload" runat="server" OnClick="btnUpload_Click" Text="Upload" />
<asp:Label ID="lblError" runat="server" Visible="false" />
</asp:Panel>
<asp:Panel ID="pnlCrop" runat="server" Visible="false">
<asp:Image ID="imgCrop" runat="server" />
<br />
<asp:HiddenField ID="X" runat="server" />
<asp:HiddenField ID="Y" runat="server" />
<asp:HiddenField ID="W" runat="server" />
<asp:HiddenField ID="H" runat="server" />
<asp:Button ID="btnCrop" runat="server" Text="Crop" OnClick="btnCrop_Click" />
</asp:Panel>
<asp:Panel ID="pnlCropped" runat="server" Visible="false">
<asp:Image ID="imgCropped" runat="server" />
</asp:Panel>
</div>
</form>
</body>
</html>
Some Javascript is required. If you were starting this kind of application from scratch, it would need an awful lot of javascript. However, jQuery's real power is illustrated by just how little javascript this page actually needs. To make use of both jQuery and JCrop, they need to be linked to in the head section of the page, along with the css file that comes as part of the JCrop download. The link to jQuery makes use of the copy available from the Google Ajax API Library for better caching and faster downloading:
<link href="css/jquery.Jcrop.css" rel="stylesheet" type="text/css" />
<script type="text/javascript" src="http://ajax.googleapis.com/ajax/libs/jquery/1.3/jquery.min.js"></script>
<script type="text/javascript" src="script/jquery.Jcrop.pack.js"></script>
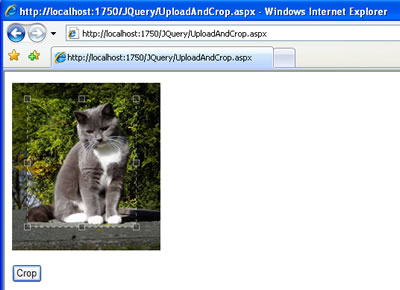
All that's now needed to activate JCrop is a handful of lines of Javascript, which go within <script> that's in the head of the document below the previous lines:
<script type="text/javascript">
jQuery(document).ready(function() {
jQuery('#imgCrop').Jcrop({
onSelect: storeCoords
});
});
function storeCoords(c) {
jQuery('#X').val(c.x);
jQuery('#Y').val(c.y);
jQuery('#W').val(c.w);
jQuery('#H').val(c.h);
};
</script>
It really is that simple. Jcrop has been applied to the image that has the id of imgCrop (the one in pnlCrop), and an event handler has been added to the select event of the cropper. This will happen when the user has completed selecting the area of the image they want to keep. The handler makes use of the storeCoords function, which sets the values of the HiddenFields, passing them the x and y coordinates of the top left of the selection relative to the image, and the width and height of the selection. That's all ASP.NET needs to know in order to process the image on the server. Now on to the server-side code.
There are 4 namespaces that need to be referenced in additional to the default ones that a new Web Form brings in:
using System.IO;
using SD = System.Drawing;
using System.Drawing.Imaging;
using System.Drawing.Drawing2D;
Since we will be working with instances of System.Drawing.Image as well as System.Web.UI.WebControls, which also has an Image class, I have aliased System.Drawing.Image, which will permit me to use a shorthand to reference the System.Drawing.Image classes. The first four lines of the code-behind simply set a variable to point to the file system path of the directory in which uploaded images will be stored, and show an empty Page_Load method:
String path = HttpContext.Current.Request.PhysicalApplicationPath + "images\\";
protected void Page_Load(object sender, EventArgs e)
{}
The next section covers the event handler for the Upload button click:
protected void btnUpload_Click(object sender, EventArgs e)
{
Boolean FileOK = false;
Boolean FileSaved = false;
if (Upload.HasFile)
{
Session["WorkingImage"] = Upload.FileName;
String FileExtension = Path.GetExtension(Session["WorkingImage"].ToString()).ToLower();
String[] allowedExtensions = { ".png", ".jpeg", ".jpg", ".gif" };
for (int i = 0; i < allowedExtensions.Length; i++)
{
if (FileExtension == allowedExtensions[i])
{
FileOK = true;
}
}
}
if (FileOK)
{
try
{
Upload.PostedFile.SaveAs(path + Session["WorkingImage"]);
FileSaved = true;
}
catch (Exception ex)
{
lblError.Text = "File could not be uploaded." + ex.Message.ToString();
lblError.Visible = true;
FileSaved = false;
}
}
else
{
lblError.Text = "Cannot accept files of this type.";
lblError.Visible = true;
}
if (FileSaved)
{
pnlUpload.Visible = false;
pnlCrop.Visible = true;
imgCrop.ImageUrl = "images/" + Session["WorkingImage"].ToString();
}
}
This code should be pretty familiar to anyone who has worked with the FileUpload control before. It simply checks to see if a file has been submitted, and ensures that it is of the right type. Then it saves the file to disk and the name of the file to a Session variable. Once the image has been saved, it is set as the ImageUrl of the Image control which has been targeted by JCrop and makes the containing Panel visible.
The next section covers the event handler for the Crop button:
protected void btnCrop_Click(object sender, EventArgs e)
{
string ImageName = Session["WorkingImage"].ToString();
int w = Convert.ToInt32(W.Value);
int h = Convert.ToInt32(H.Value);
int x = Convert.ToInt32(X.Value);
int y = Convert.ToInt32(Y.Value);
byte[] CropImage = Crop(path + ImageName, w, h, x, y);
using (MemoryStream ms = new MemoryStream(CropImage, 0, CropImage.Length))
{
ms.Write(CropImage, 0, CropImage.Length);
using(SD.Image CroppedImage = SD.Image.FromStream(ms, true))
{
string SaveTo = path + "crop" + ImageName;
CroppedImage.Save(SaveTo, CroppedImage.RawFormat);
pnlCrop.Visible = false;
pnlCropped.Visible = true;
imgCropped.ImageUrl = "images/crop" + ImageName;
}
}
}
This section references the image name from the Session variable, and then declares a number of integers that get their values from the HiddenFields that JCrop wrote to when the user selected the area they wanted to keep.
It then calls a method called Crop() to perform the actual cropping of the image (more of which soon). Crop() returns a byte array, which is written to a MemoryStream so that it can be used and converted back to an Image. This is then prefixed with the word "crop" in its name before being saved to disk and displayed to the user.
The Crop() method is below:
static byte[] Crop(string Img, int Width, int Height, int X, int Y)
{
try
{
using (SD.Image OriginalImage = SD.Image.FromFile(Img))
{
using (SD.Bitmap bmp = new SD.Bitmap(Width, Height))
{
bmp.SetResolution(OriginalImage.HorizontalResolution, OriginalImage.VerticalResolution);
using (SD.Graphics Graphic = SD.Graphics.FromImage(bmp))
{
Graphic.SmoothingMode = SmoothingMode.AntiAlias;
Graphic.InterpolationMode = InterpolationMode.HighQualityBicubic;
Graphic.PixelOffsetMode = PixelOffsetMode.HighQuality;
Graphic.DrawImage(OriginalImage, new SD.Rectangle(0, 0, Width, Height), X, Y, Width, Height, SD.GraphicsUnit.Pixel);
MemoryStream ms = new MemoryStream();
bmp.Save(ms, OriginalImage.RawFormat);
return ms.GetBuffer();
}
}
}
}
catch (Exception Ex)
{
throw (Ex);
}
}
This might at first glance look a little daunting to beginners, but most of the code just sets properties that affect the quality and appearance of the resulting image. What it does is to simply use the original image as a base from which a new image is drawn, and then save it to a MemoryStream object, which is returned as a byte array to be consumed by the calling code above. You should take note of the using blocks that are employed in this method. They ensure that Image, Bitmap and Graphics objects are all disposed of when the method is done. There's nothing worse than finding that your busy web app has slowed to a crawl through unreleased resources.
