I'll start by discussing the data type that Access offers to support storing files: the Ole Object data type. OLE (Object Linking and Embedding) is the technology that the Office suite of products use to assist with sharing files across applications. For example, when you insert a picture in a Word document, OLE comes into play. When you see Excel spreadsheets embedded in a Word doc, again, it's the result of OLE. Finally, if you download the sample Northwind database, you will see the worst possible quality images of the sales people appear on the Employees form:
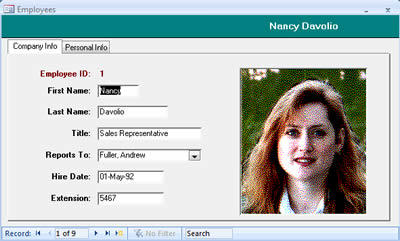
This is also OLE at work. OLE servers are applications which are responsible for converting original files into something that OLE can work with. Taking something like a jpeg or gif, the OLE Server responsible will reformat the file and possibly increase its overall size by up to 100 times to make it work with OLE. It will often reduce quality markedly. The application that displays the result must understand the format, and the correct OLE servers must be in place to decode the database field content. To cap it all, there is a performance overhead required in encoding and decoding OLE's proprietory format. All of this goes to make OLE totally unsuitable for files to be used in web applications. It is also OLE that has helped give Access a poor reputation when it comes to storing images or files within it.
The OLE Object field is also happy to accept Long Binary Data, which is basically a BLOB (Binary Large OBject). Being a byte-for-byte copy of the original file, the BLOB is easy to extract and present in its original form over HTTP, but not so easy within the Access application itself.
For this demonstration, I have taken the Northwind sample database and added a few fields to the Employees table. There is already an OLE Object field for Photo, and to this I add the following:
PhotoFileName TEXT
PhotoMime TEXT
Resume OLE Object
ResumeFileName TEXT
ResumeMime TEXT
The fields with "Mime" in their name will be used to store the content-type of the file. Browsers look at this property to decide how to treat an HTTP response. If the MIME type is one that they know, they will either display the content inline (where they are set up to do so, such as with text/html or image/gif) or they will invoke the default application for the known MIME type (e.g MS Word for application/msword). Finally, if they do not know what do to, they present the Save/Open dialogue box.
The next step is to create an Employee Entry page, so that users can create a new employee, and upload an image and a Resume (or CV as we call them in Rome):
<%@ Page Language="C#" AutoEventWireup="true" CodeFile="AccessUpload.aspx.cs" Inherits="AccessUpload" %> <!DOCTYPE html PUBLIC "-//W3C//DTD XHTML 1.0 Transitional//EN" "http://www.w3.org/TR/xhtml1/DTD/xhtml1-transitional.dtd"> <html xmlns="http://www.w3.org/1999/xhtml"> <head runat="server"> <title></title> <style type="text/css"> body{font-family: tahoma;font-size: 80%;} .row{clear: both;} .label{float: left;text-align: right;width: 150px;padding-right: 5px;} </style> </head> <body> <form id="form1" runat="server"> <div> <div class="row"> <span class="label"><label for="FirstName">First Name: </label></span> <asp:TextBox ID="FirstName" runat="server"></asp:TextBox> </div> <div class="row"> <span class="label"><label for="Surname">Surname: </label></span> <asp:TextBox ID="Surname" runat="server"></asp:TextBox> </div> <div class="row"> <span class="label"><label for="Photo">Photo: </label></span> <asp:FileUpload ID="PhotoUpload" runat="server" /> </div> <div class="row"> <span class="label"><label for="Resume">Resume: </label></span> <asp:FileUpload ID="ResumeUpload" runat="server" /> </div> <div class="row"> <span class="label"> </span> <asp:Button ID="Button1" runat="server" Text="Submit" onclick="Button1_Click" /> </div> </div> </form> </body> </html>
I've used a bit of CSS to style this and the result looks like this:
All of the action takes place in the Button1_Click event in the code-behind:
protected void Button1_Click(object sender, EventArgs e)
{
  if (PhotoUpload.HasFile && ResumeUpload.HasFile)
  {
    Stream photoStream = PhotoUpload.PostedFile.InputStream;
    int photoLength = PhotoUpload.PostedFile.ContentLength;
    string photoMime = PhotoUpload.PostedFile.ContentType;
    string photoName = Path.GetFileName(PhotoUpload.PostedFile.FileName);
    byte[] photoData = new byte[photoLength - 1];
    photoStream.Read(photoData, 0, photoLength);

    Stream resumeStream = ResumeUpload.PostedFile.InputStream;
    int resumeLength = ResumeUpload.PostedFile.ContentLength;
    string resumeMime = ResumeUpload.PostedFile.ContentType;
    string resumeName = Path.GetFileName(ResumeUpload.PostedFile.FileName);
    byte[] resumeData = new byte[resumeLength - 1];
    resumeStream.Read(resumeData, 0, resumeLength);

    string qry = "INSERT INTO Employees (FirstName, LastName, Photo, PhotoFileName, PhotoMime, Resume,
               ResumeFileName, ResumeMime) VALUES (?,?,?,?,?,?,?,?)";
    string connect = "Provider=Microsoft.Jet.OleDb.4.0;Data Source=|DataDirectory|Northwind.mdb";
    using (OleDbConnection conn = new OleDbConnection(connect))
    {
      OleDbCommand cmd = new OleDbCommand(qry, conn);
      cmd.Parameters.AddWithValue("", FirstName.Text);
      cmd.Parameters.AddWithValue("", Surname.Text);
      cmd.Parameters.AddWithValue("", photoData);
      cmd.Parameters.AddWithValue("", photoName);
      cmd.Parameters.AddWithValue("", photoMime);
      cmd.Parameters.AddWithValue("", resumeData);
      cmd.Parameters.AddWithValue("", resumeName);
      cmd.Parameters.AddWithValue("", resumeMime);
      conn.Open();
      cmd.ExecuteNonQuery();
    }
  }
The two upload controls are checked for the presence of a file each, and then the contents of the files are read into byte arrays, and their content types and names are obtained. These along with the first name and last name are passed into the parmeters before the whole lot is inserted into the database.
Having got the files there, some way is needed to retrieve them and deliver them to the browser. A Generic Handler is a good option for this. I decided to create two: one for the Resume and one for the Photo. You might be tempted to combine both tasks into one handler. I'm only going to show the Resume handler, because apart from the SQL and the data fields, all the code is the same as the PhotoHandler:
<%@ WebHandler Language="C#" Class="ResumeFileHandler" %>
using System;
using System.Data.OleDb;
using System.Web;

public class ResumeFileHandler : IHttpHandler
{

  public void ProcessRequest(HttpContext context)
  {
    string qry = "SELECT Resume, ResumeFileName, ResumeMime FROM Employees WHERE EmployeeID = ?";
    string connect = "Provider=Microsoft.Jet.OleDb.4.0;Data Source=|DataDirectory|Northwind.mdb";

    using (OleDbConnection conn = new OleDbConnection(connect))
    {
      if (context.Request.QueryString["id"] != null)
      {
        OleDbCommand cmd = new OleDbCommand(qry, conn);
        cmd.Parameters.AddWithValue("", context.Request.QueryString["id"]);
        conn.Open();
        using (OleDbDataReader rdr = cmd.ExecuteReader())
        {
          if (rdr.HasRows)
          {
            rdr.Read();
            context.Response.AddHeader("content-disposition", "attachment; filename=" + rdr["ResumeFileName"]);
            context.Response.ContentType = rdr["ResumeMime"].ToString();
            context.Response.BinaryWrite((byte[])rdr["Resume"]);
          }
        }
      }
    }
  }

  public bool IsReusable
  {
    get { return false; }
  }

}
A generic handler (.ashx file) implements IHttpHandler, which enforces 2 methods - ProcessRequest() and IsReusable. All the action takes place in ProcessRequest. I'm passing in the EmployeeID via the querystring, which should tell you that ASP.NET will serve requests to files ending in .ashx. The code obtains the values for the file name, and content type, and then sets the response headers accordingly, before finally streaming the file as an array of bytes.
An example page which lets the user get the files is as follows:
<form id="form1" runat="server">
<div>
  <a href="ResumeFileHandler.ashx?ID=12">Get Resume</a>
  <br />
  <img src="ImageFileHandler.ashx?ID=12" alt="" />
</div>
</form>
To provide access to the Resume, a simple hyperlink is all that's needed. The file is delivered when the user clicks the link. The image, on the the hand, has it's src pointing to the filehandler. When the html for the page is first sent to the browser, it then looks at other "resources" that the page needs, and requests them one by one. The src attribute of the img tag points to the location of one of these resources.
Storing files as byte arrays in Access is a lot more efficient than embedding OLE objects. If you site is one that needs to serve a relatively small amount of users in an Intranet, this approach may serve you well. However, as I said at the beginning of the article, the preferred option is to store a filename in the database and the files on disc. I debated whether I should provide guidance on what I believe to be the wrong way to manage files with Access, but I see requests for help on this quite often. However, if you have no choice about how you work, for example because you have to deal with a legacy database with files already in it, hopefully this article will have provided you with some help.
